Editor Overview
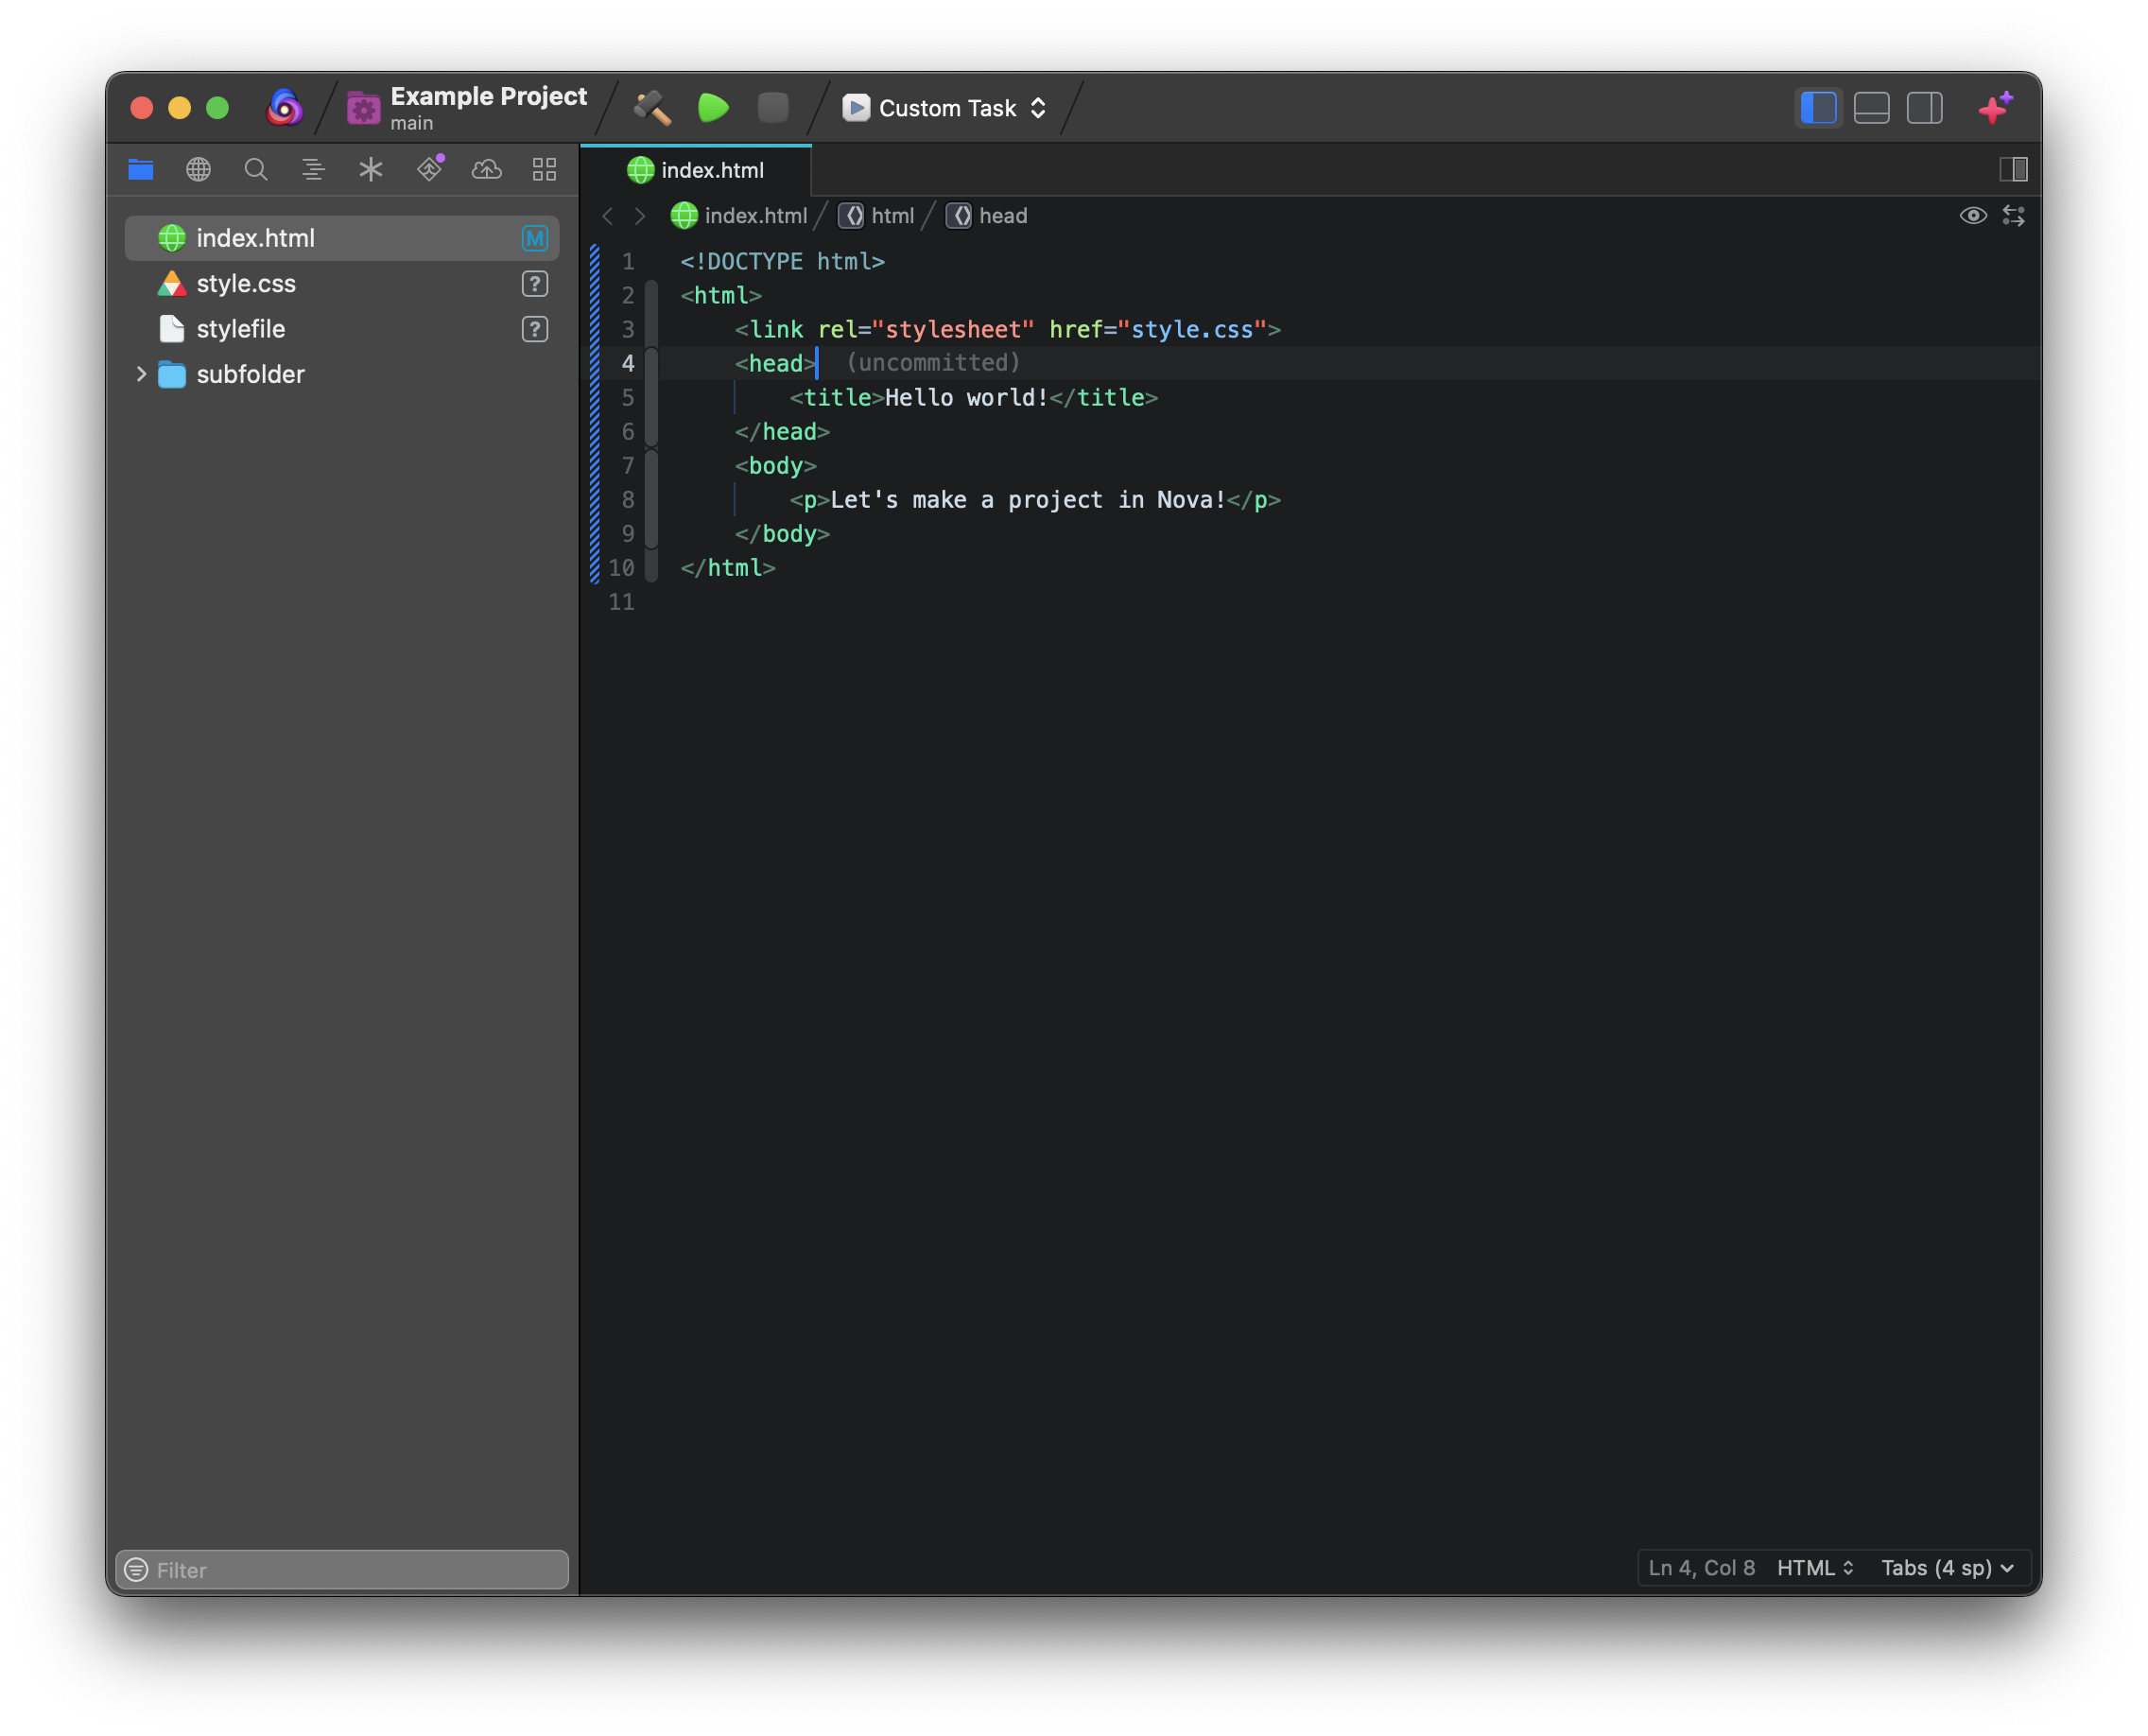
Opening a text document in Nova will open an Editor tab. Nova includes a fully-featured code editor with syntax highlighting for multiple languages built-in, contextual completions, support for multiple cursors and code folding, and much more.
Basic Navigation
On a basic level, using Nova’s editor should feel very similar to editing text in many other applications. You can click anywhere in the editor to move the cursor to a desired location, and use the arrow keys to move the cursor up a line, down a line, left one character, or right one character.
You can select text by clicking and holding down your cursor at the start of the selection, and dragging your cursor across the text you want to select. You can also hold ⌥ Option and select text to perform a column selection. In this mode, you can select text on different lines without selecting all the text in-between, allowing you to select only within vertical columns of text.
Additional Cursor Controls
Besides clicking or using the arrow keys to move the cursor, there are additional keyboard shortcuts useful for moving the position of the cursor in specific ways:
- ⌘↑ and ⌘↓ will move immediately to the top or bottom of the document, respectively.
- ⌘← and ⌘→ will move immediately to the beginning or end of the current line, respectively.
- Fn↑ and Fn↓ (or PgUp and PgDn) will page up and down through the document without moving the cursor.
- ⌥← and ⌥→ will move back and forward one “word” at a time.
Go To Line
If you want to jump to a specific line number in a file, you can press ⌃G (Control+G) to open the Go To Line palette.

Just enter the line number you want to jump to and press Return to move the cursor directly to the specified line. You can also specify a column to jump to in the format line:column. For instance, you can enter 12:30 to jump to line 12, column 30.
Layout
Path Bar
At the top of Nova’s editor is the Path Bar. This shows you the file path of the current document, along with some additional controls.
- Back and Forward
- Go back and forwards through your cursor’s position history. For instance, if you use Jump to Definition to go to a class definition, pressing Back will return you to the line you jumped from.
- Path
- The path of the file being edited, as well as the current symbol the cursor is within (including any ancestors).
- Preview
- Open a Preview for the current document. You can choose to open the Preview in a new tab, a new split view, or an external browser.
- Comparison View
- Open a Comparison View to view historical changes in this document when working in a Git repository.
Code Structure Headers
As you scroll through a document, you’ll see code structure headers appear at the top of the editor view, just below the Path Bar.
These headers display where in the document’s structure you have currently scrolled to - for instance, what class or function you’re viewing, or what HTML element you’re in. These can be useful for keeping track of where you are once the opening of the current element or symbol has scrolled out of view. Code structure headers are automatically updated as you scroll, and can stack on top of each other to display deeply-nested elements.
Status View
The bottom-right corner of the editor shows the Status View, a small overlay where you can quickly access some useful information and settings.
- Syntax Inspector
- Not visible by default. Click to enable the syntax inspector, useful for developing language and theme extensions. Requires Show extension development items in the extensions menu to be enabled in Settings > General.
- Line and Column
- Displays the current line and column position of the cursor. Click to open Go To Line.
- Syntax
- Displays what syntax mode the editor is currently set to. Click to change the current syntax mode.
- Indentation
- Displays whether tabs or spaces are used for indentation in this document, and how many spaces should be used. Click to change the document’s indentation preference.
Gutter

|
On the left edge of the editor is the gutter. Here you can see the line number of each line in the document, as well as controls for folding sections of code. When working in Git repositories, you’ll also find markers highlighting changes in the document since the last commit. |
Line Numbers
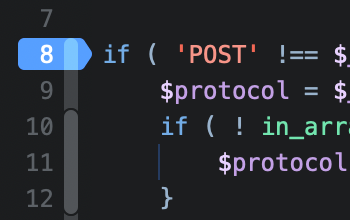
By default, you can click a line number to select all the text on that line. You can also click and drag across multiple line numbers to select multiple lines.
|
If the current syntax mode supports debugging (either through Nova’s built-in support or via an extension), clicking the line number will instead add a breakpoint. In these cases, you can hold ⌥ Option while clicking to select the line instead. You can change this behavior so that clicking a line number always selects a line, even in languages with debugging support, in Nova’s Settings > Editor > Editing. If you change this setting, holding ⌥ Option while clicking will instead insert a breakpoint. |
|
Code Folding
To fold a section of code, simply click the control that spans the height of the section you wish to fold. What constitutes a ‘section’ may vary based on the syntax mode, but generally includes code like class and function declarations, or HTML elements.
Once folded, the control will change shape to indicate a folded section, and the code will be replaced with a (⋯) element in the main editor view. Click the gutter control again to unfold the section, or click the ellipses in the editor to unfold the section and select all its contents.
In some cases, sections may be nested, such as HTML elements with child elements. In these cases, folding controls will overlap, with more deeply-nested sections having more vivid folding controls. Folding or unfolding a section with child sections will collapse the entire section, including all child elements.
Color Wells and Picker
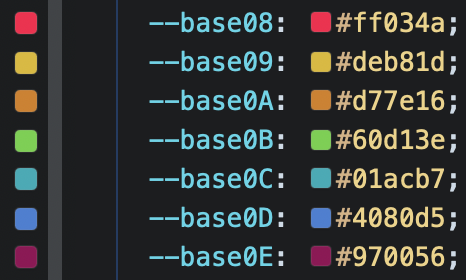
In supported syntax modes, such as CSS, Nova can display color wells in the Editor, providing an easy visual preview of a color defined in your code. Depending on your settings, these may appear in either the gutter, or inline in the editor.
|
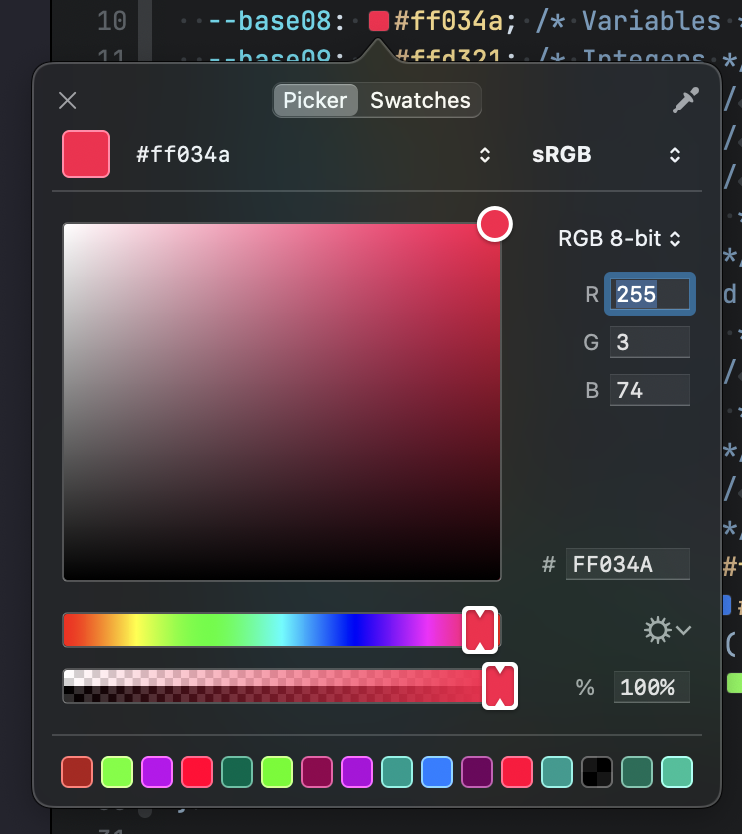
Click a color well to open the color picker. Nova features its own custom color picker designed especially for web development. It supports a variety of color formats, including hexadecimal, The picker also supports both the sRGB and Display P3 color spaces, for displays that support wide color gamuts. |
|
Minimap
Nova also supports an optional minimap, showing a compact overview of the layout of the entire document. You can toggle the visibility of the minimap from the Editor menu > Display Options > Show Minimap.
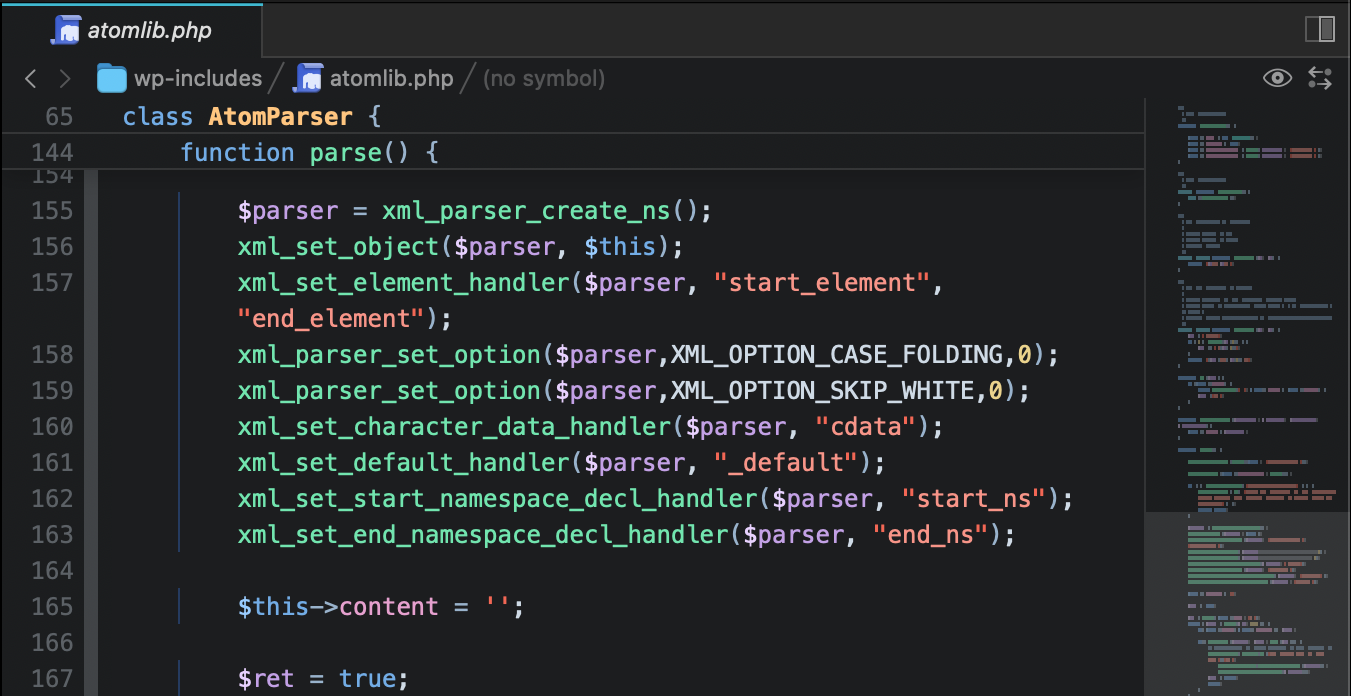
Syntax Highlighting
When opening a text file in Nova, Nova will apply syntax highlighting to the document, applying different colors and text styles to different elements of the document. Nova includes a number of built-in syntax modes, and will attempt to automatically determine the appropriate mode for a given document based on its file extension. The colors and styles applied will vary based on both the syntax mode selected and the current editor theme, and will update automatically as you make changes to the document.
Available Syntaxes
In addition to plain text, Nova includes built-in syntax highlighting support for the following languages:
- CSS
- Diff
- HTML
- HTML (EJS)
- HTML (ERB)
- HTML (Jinja)
- INI
- JavaScript (including JSX)
- JSON
- Less
- Lua
- Markdown
- Perl
- PHP
- Python
- Regex
- Ruby
- Sass
- SCSS
- Shell Script
- SQL
- Tree-sitter Queries
- TSX
- TypeScript
- XML
- YAML
- HTML (Jinja)
- Jinja
- TOML
Additional syntax modes can be installed as Extensions.
Indentation
When opening an existing file, Nova will automatically attempt to detect the indentation style of the current file, including whether it uses spaces or tabs, and how many spaces constitute a tab or indentation level. You can change the current indentation setting for a file from the Status View. Newly created files will use the indentation settings specified in Nova’s Settings > Editor > Indentation.
You can also enable indentation guides, which renders lines in the editor at each indentation level. This setting, as well as options for customizing the appearance of these guides, can also be found in Settings > Editor > Indentation.
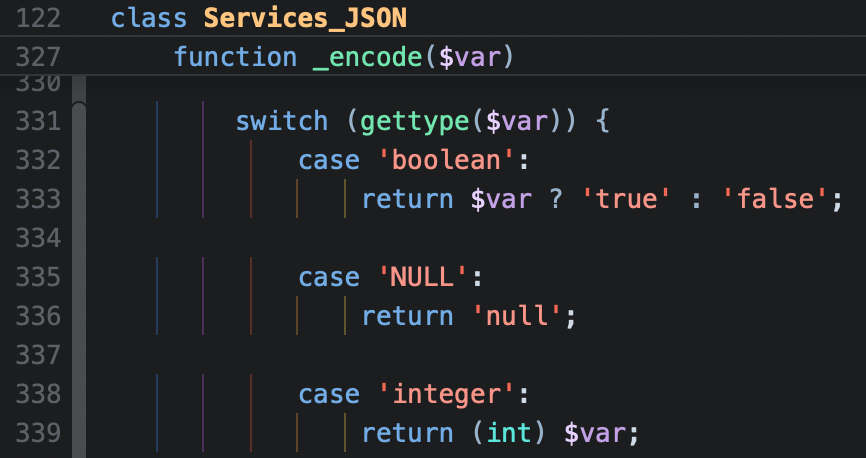
Nova’s editor also has a variety of built-in features useful for automatically changing the current indentation level, or for converting spaces to tabs (and vice versa). You can find these options in the Editor menu > Line and Editor menu > Indentation.
The Shift Left and Shift Right commands, bound to ⌘[ and ⌘] (Command+[ and Command+]) respectively, allow you to either remove or add one indentation level to the current line.
Line Endings and Text Encodings
Text documents can come in a variety of formats, with different languages and platforms often using different line endings or text encodings. Fortunately, Nova supports the line ending styles of most major platforms, including:
- macOS / Unix (LF)
- Mac OS Classic (CR)
- Windows (CRLF)
Nova also supports a number of text encoding formats:
- Unicode (UTF-8)
- Unicode (UTF-8) with BOM
- Unicode (UTF-16)
- Western (Mac OS Roman)
- Western (ISO Latin 1)
- Western (Windows Latin 1)
- Western (ASCII)
- Japanese (Shift JIS)
For the most part, Nova should automatically detect the line ending and encoding format of any documents you open, and configure these settings for you. If needed, you can tell Nova to use a specific line ending or text encoding format from the Editor menu > Line Endings or Editor > Text Encoding.
When switching line ending or text encoding formats, Nova will ask if you’d like to convert the document or just switch. Convert will change all text in the document to use the newly selected encoding. Just Switch will only change how Nova displays the document without affecting its contents. For instance, if Nova has incorrectly detected the encoding used by the document and is displaying it incorrectly, you’ll want to select Just Switch.
Toggle Comment
For syntax modes that support comments, you can use the Editor > Comment > Toggle Comment command, bound to ⌘/ (Command+/) by default, to automatically insert comments. Using this command will comment out the current selection in the editor. If nothing is selected, the current line will be commented instead.
In syntaxes that support both line and block comments, Nova will prefer to use line comments by default if the selection is only a single line. Pressing ⌥⌘/ (Option+Command+/) instead will use block comment syntax. The default behavior for these commands can be changed in Settings > Editor > Editing > Prefer commenting by line.
Completions

As you write in a document, Nova will offer completion suggestions to help you quickly finish what you’re typing. These completions are context-sensitive, offering suggestions based on the current syntax mode, other symbols found in the document or project, any relevant Clips you have created, and intelligence provided by any language server extensions you may have installed.
You can accept the top-most completion while typing by pressing Return or Tab. When multiple completions are listed, you can use the up and down arrow keys to select the completion you want to use before pressing Return or Tab.
Autoclosing
In supported syntaxes, such as HTML, Nova will also automatically complete closing tags for you after typing an opening tag. For instance, if you type…
<html></
Then as soon as you type the /, Nova will automatically complete it for you as:
<html></html>
Multiple Cursors
You can create multiple cursors in the editor to edit text at multiple locations in the document at once. To create additional cursors, simply hold ⌥ Option and click, and a new cursor will be placed in the spot you click.
You can also hold ⌥ Option and drag the mouse up or down a column of text to create cursors on every line you drag across, much like column selection. You can also use Editor > Selection > Select Above and Select Below (⌥⌘Up and ⌥⌘Down, respectively) to add cursors directly above or below the current cursor. If multiple cursors are already present, they will be added before the first cursor or after the last cursor in the document.
Git Author Annotations
When working in Git repositories, Nova’s Editor will display the author, most recent commit time, and commit message for the current line.

If a line has never been commited to the repository, the annotation will simply display (uncommitted). You can customize these annotations (such as showing avatars for the line’s author) or disable them in Settings > Git.
NOTE: Displaying these annotations requires Nova to look up the
blamestatus for the current line, which can be CPU-intensive in larger repos. In these cases, you may want to disable author annotations to improve performance.
Customization
Nova’s editor is deeply customizable, with a wide variety of settings available for adjusting how the editor displays your documents. Many common settings, such as toggling line wrapping or showing invisible characters like spaces and tabs, can be found in the Editor menu > Display Options.
For more in-depth customization, you can go to Nova’s Settings > Editor. Here you’ll find a wide variety of options for configuring the layout and display of Nova’s editor, including things like changing the font or font size, toggling the visibility of elements like code structure headers or line numbers, or setting the default syntax mode and text encoding for new documents.
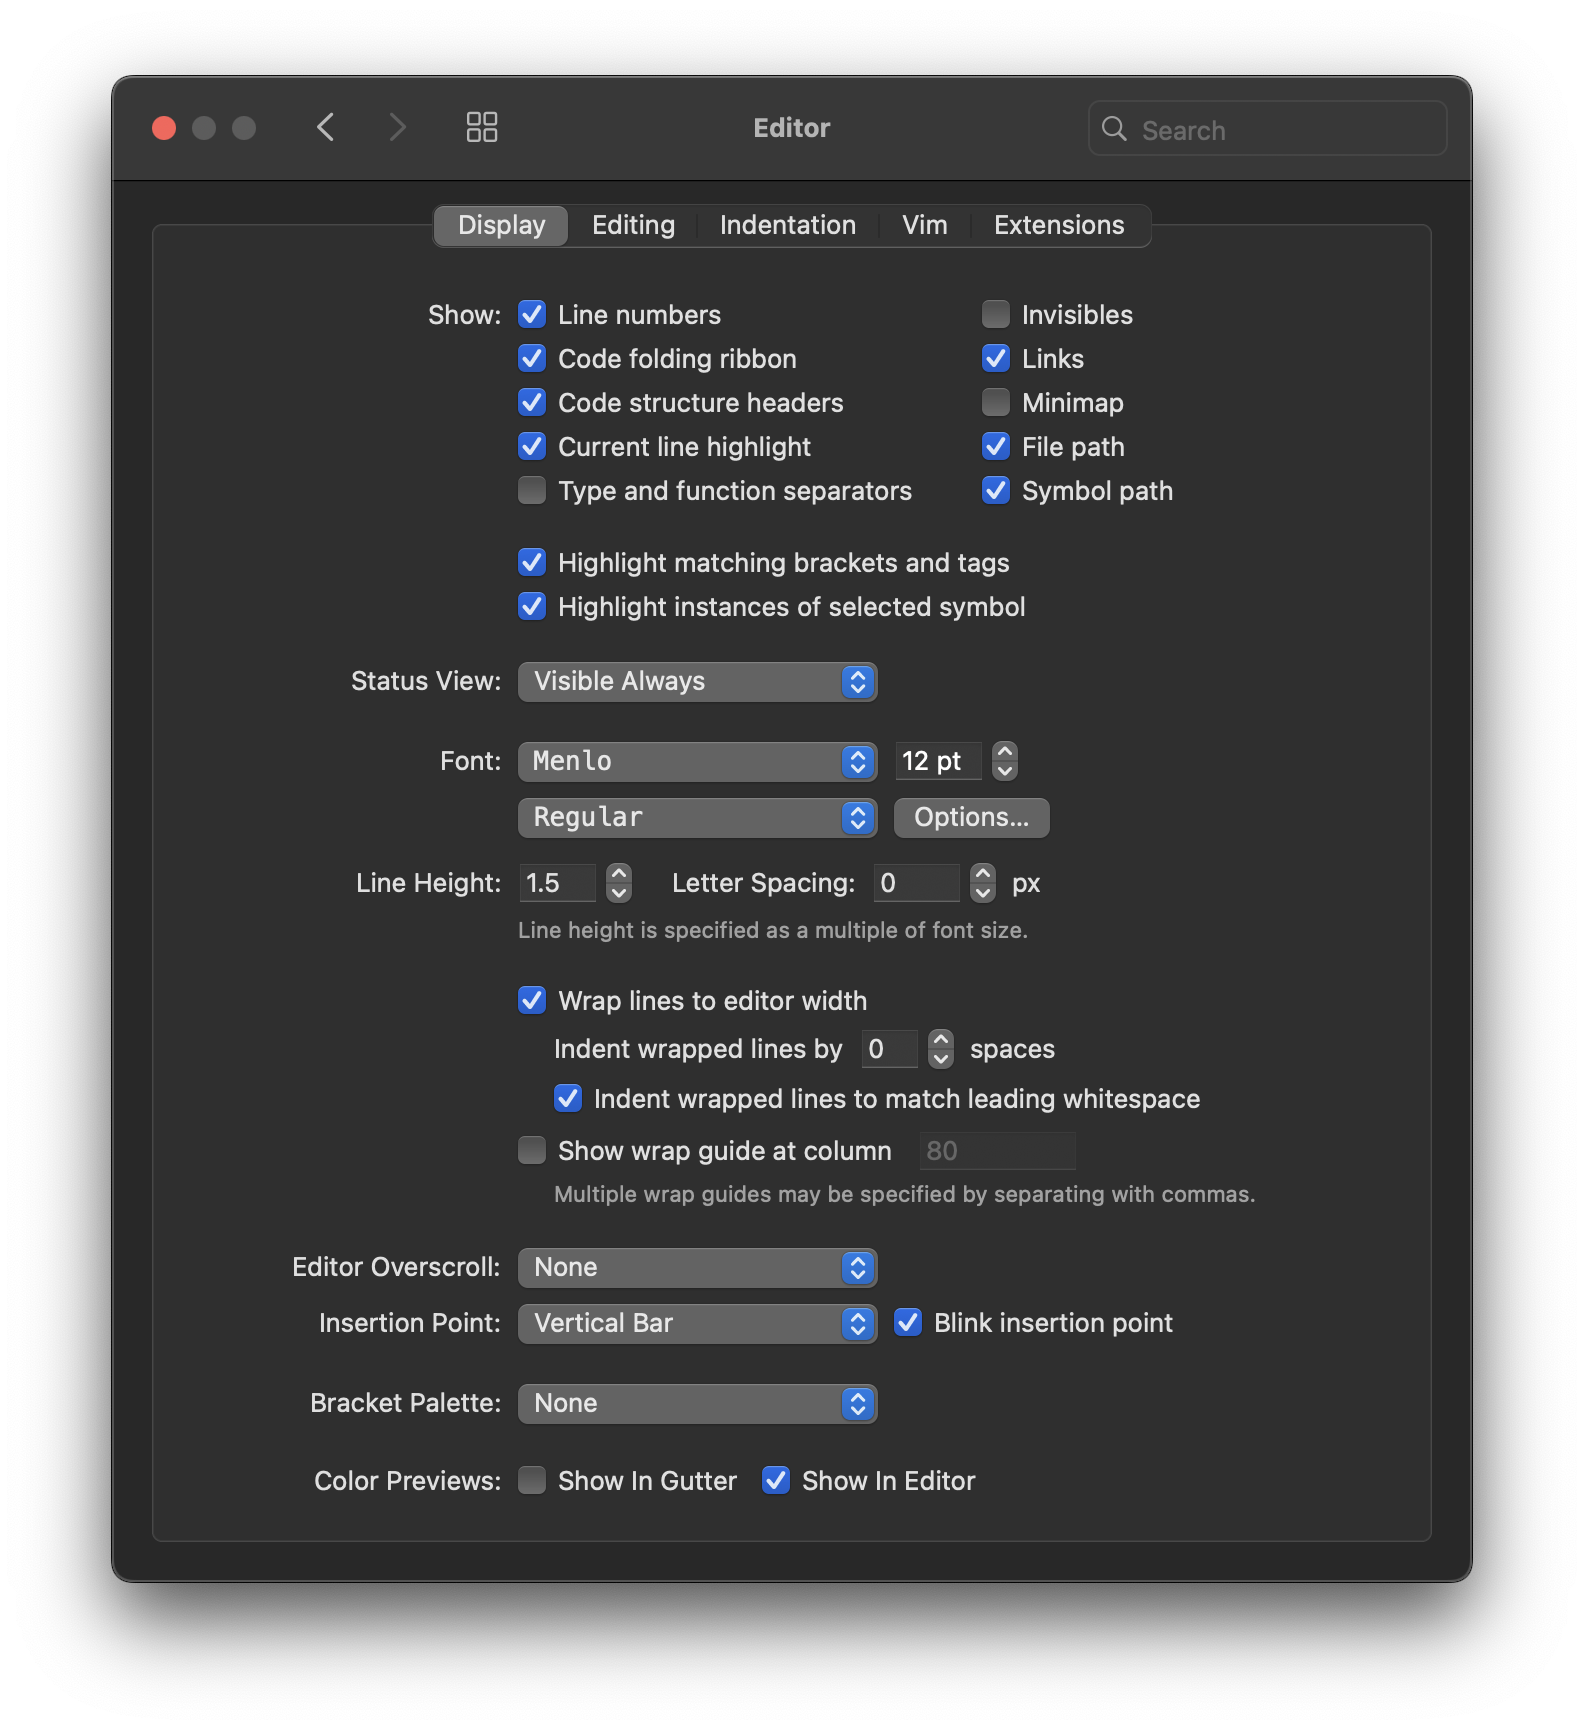
For a comprehensive list of the available settings, see our dedicated article on Editor Settings.
|
Next → Find Bar |