Symbols
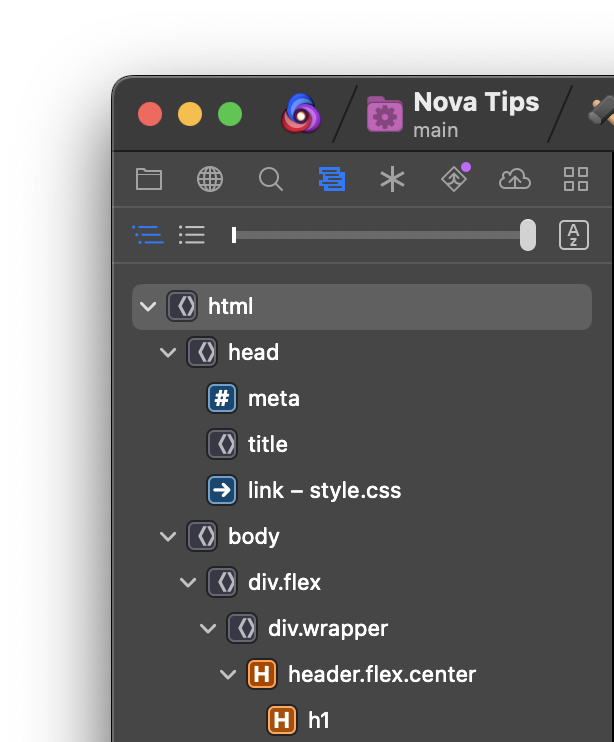
Nova’s Editor automatically identifies symbols found throughout the current document. The definition of a symbol varies depending on the current syntax mode, but generally includes elements, classes, functions, and variables. In addition to providing syntax highlighting for these symbols, Nova provides a number of useful features for finding and navigating to particular symbols both in the current document and throughout your projects.
Symbols Sidebar
|
The The Symbols Sidebar defaults to a |

|
Along the top of the Symbols Sidebar, you can choose to switch to a list view, which flattens the hierarchy of the document into a single ordered list. In documents with deeply-nested symbols, a slider control will appear allowing you to collapse or expand all parent symbols at different levels of the hierarchy. Slide this control all the way to the right to expand all symbols, or to the left to collapse. You can also
sort the symbol list alphabetically. By default, the symbols list is sorted in the order the symbols appear in the document.
At the bottom of the Symbols Sidebar, you’ll find the Filter field. You can type part of the name of a symbol you’re trying to find, and the symbol list will be filtered to show only symbols matching your query.
Bookmarks
|
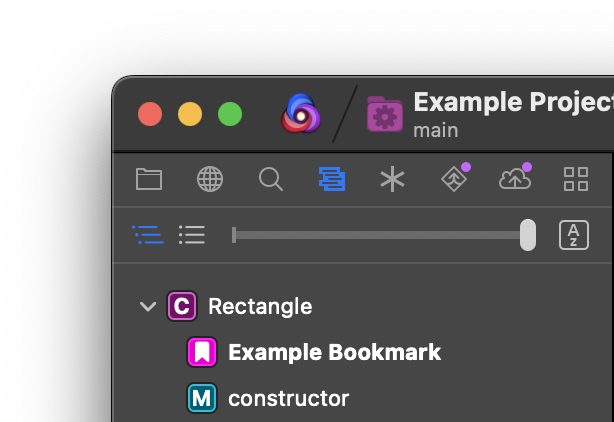
You can also manually create bookmarks within your documents that appear as listings in the Symbols Sidebar. To create a bookmark, simply create a comment in the document starting with … will create a bookmark labeled “Example Bookmark” in the Symbols Sidebar. This is supported in any syntax mode that features comments, including Nova’s built-in syntaxes. |

|
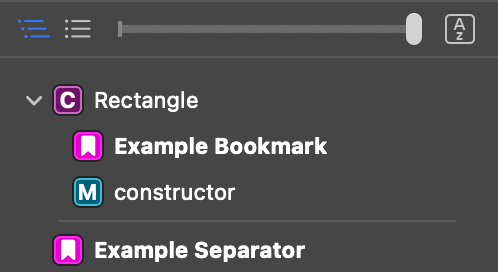
You can also create bookmarks that add separators to the Symbols Sidebar, useful for visually distinguishing sections of code. To create a separator, simply add a dash between the ! and the name of the bookmark, such as:
// ! - Example Separator

Jump to Definition
When reading code, you’ll often find a reference to a class or function whose purpose or behavior is unfamiliar to you. In these cases, you can use Jump to Definition to jump straight from a reference to the original definition of the symbol.
To use Jump to Definition, simply ⌘Command+Click on a symbol being referenced. You can also use Go > Jump to Definition, bound to ⌃⌘J (Control+Command+J) by default, to jump to the definition of the symbol located at the current cursor position. After jumping to a definition, you can use Go > Back or the navigation controls in the editor’s Path Bar to return your cursor to its previous position.
Language Server Commands
When a compatible language server for the current syntax mode is installed, you may also find additional “Jump to” commands accessible from the Go menu:
- Jump to Declaration
- Jump to where the symbol was initially declared as existing, which may be separate from where it was defined (where a value is set).
- Jump to Type Definition
- Jump to where the type of the symbol, such as its class, was originally defined.
- Jump to Implementations
- Some programming languages may have concepts such as interfaces or protocols that are then implemented by other classes. You can use this command from such a symbol to jump to its implementations.
- Jump to References
- Jump to other locations where this symbol is called or referenced.
Go To Symbol
You can use the Go To Symbol… command palette found in the Go menu to quickly jump to any symbols or bookmarks in the current document. This command is not bound to a key combination by default, but one can be set manually in Settings > Key Bindings.

Go To Symbol can only locate symbols within the currently focused file. To search for a symbol located elsewhere in your project, you can use Open Quickly instead.
|
← Previous Find Bar |
Next → Issues and Warnings |