Files Sidebar
|
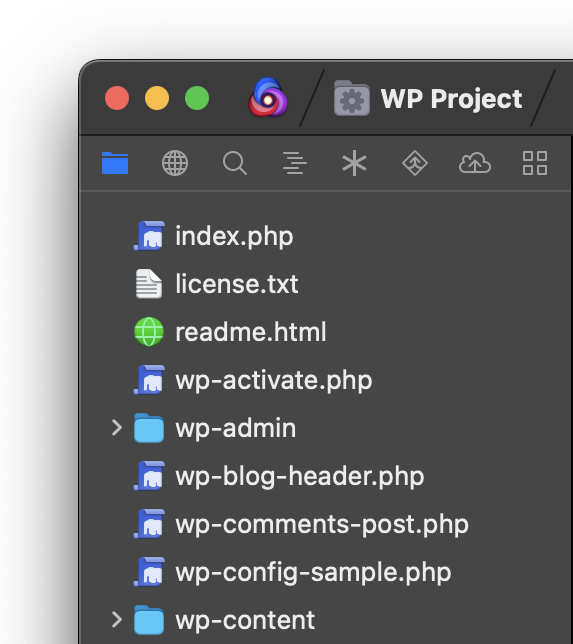
The In Local Projects, the Files Sidebar shows your project’s root directory by default. In Remote Projects, it shows your home folder ( |
|
The Files Sidebar functions much like other file managers, such as macOS’s Finder. You can double-click folders or click the disclosure triangle next to them to expand them and view their contents, and drag files into folders with your cursor.
Right-click (or ⌃Ctrl+Click) a file to open a context menu with additional options. Press Return to rename a selected file or folder, or Delete to delete it. You can even press the Space bar after selecting a file to open a Quick Look preview of that file.
Multiple files can be selected at once by holding ⌘Command as you click each file. You can also select one file, hold ⇧Shift, and click a second file to select everything in between the two files (inclusive).
Opening Files
You can open a file in the Files Sidebar by simply single-clicking it. This will open the file in a type of tab called the transient tab. The transient tab changes to reflect whichever file you just selected in the Files Sidebar - if you click a different file, the transient tab’s contents will be replaced by the new file you selected. This allows you to quickly click between multiple files to check their contents.
The transient tab is denoted in the tab bar by an italicized file name.
If you double-click a file in the Files Sidebar, or make any changes to the file in the transient tab, the tab will become a standard tab. Standard tabs will remain open to their chosen document until closed, and single-clicking another file in the Files Sidebar will open it in a new transient tab without replacing any standard tabs. Standard tabs do not have italicized file names.
You can disable the transient tab altogether in Nova’s Settings > Files > Documents > “Open documents with a single-click”. Disabling this option will require you to double-click files in the Files Sidebar to open them, and they will always open in standard tabs.
When navigating the Files Sidebar with the keyboard, you can also press ⌘↓ (Command+Down Arrow) to open the currently selected file. This will always open it in a standard tab.
Focused Files
As you switch between open tabs, the Files Sidebar will automatically select the currently focused file and scroll the view to display it. It will even expand any necessary folders to ensure the file is visible.
This behavior can be changed in Nova’s Settings > Files > Documents > “When a tab is focused”. You can choose whether to reveal the file and scroll it into view (the default behavior), simply reveal the file without scrolling the Files Sidebar, or do nothing.
Display Options
In the View menu, you’ll find a few options to adjust how the Files Sidebar displays its contents:
- Show/Hide Hidden Files
- Toggle the display of hidden files, such as dotfiles or system files.
- Show/Hide Ignored Files
- Toggle the display of ignored files, such as those ignored in Settings > Files or ignored by Git.
- Show Folders Above Files
- If enabled, folders will always be listed before files. By default, folders and files will be listed together in alphabetical order.
Filtering
At the bottom of the Files Sidebar is the Filter field. Type the name or extension of a file you’re looking for, and the Files Sidebar will be filtered to show only files and folders containing your search term.
NOTE: The Filter field only filters by the file’s path, including folder names and extensions. It does not search the contents of files.
Navigation Controls
By default, the Files Sidebar only displays the top level of your project’s folder structure for simplicity’s sake. You can optionally enable additional navigation controls for the Files Sidebar, allowing you to navigate into specific folders and go back and forward through your navigation history.
To show these controls, enable the checkbox found in Nova’s Settings > Files > Documents > “Show navigation controls”.
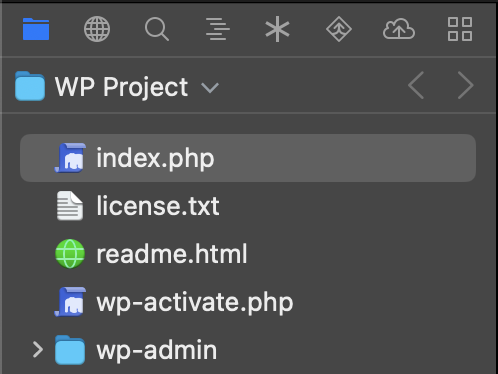
With navigation controls enabled, the Files Sidebar’s behavior changes slightly. You can still expand a folder in-place by clicking its disclosure triangle. However, double-clicking a folder will now navigate the sidebar into that folder.
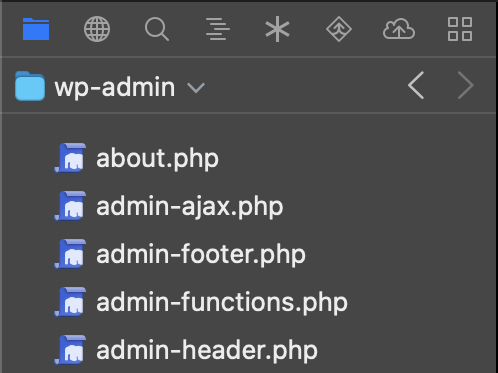
You can use the < Back and > Forward buttons in the navigation bar to return to the previous folder you navigated to. You can also click the current folder in the navbar to display a dropdown menu, allowing you to navigate to folders further up in your Mac’s file system.
Git Status
|
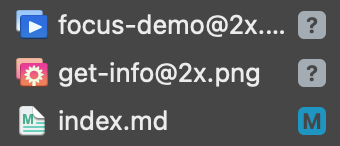
When working in a Git repository, the Files Sidebar will also show the Git status of any files in your project. The M icon means that the file has been modified since the last commit, while the ? icon means the file is new to (or was not previously tracked by) the repository. |
|
Context Menu
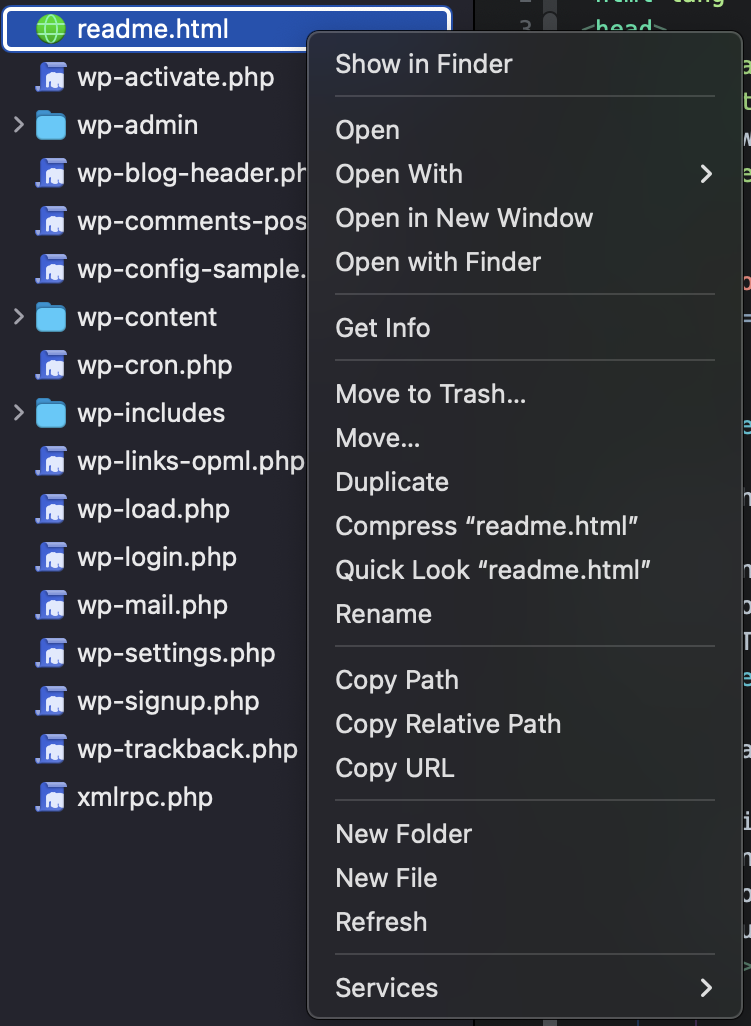
You can right-click a file or folder to open the Context Menu. The menu’s exact contents may vary slightly depending on the selected file. You can duplicate, rename, and delete files from the context menu, as well as perform some additional actions:
|
|
- Open with Finder
- For files, this opens the file with the default app associated with it on your Mac. For folders, this opens the folder in Finder directly.
- Get Info
- View more details, such as file permissions and modification dates.
- Compress
- Compress the selected files into a .zip file.
- Copy Path
- Copy the complete path to the file on your Mac.
- Copy Relative Path
- Copy the file’s path relative to the current folder. If Navigation Controls are enabled, this will be relative to the folder you’ve navigated into.
- Copy URL
- For local files, this will provide a
path://URL to the file on your Mac. - Services
- Pass the file to Services (apple.com) provided by other apps.
Many of these commands can also be accessed from the File menu > Actions.
Get Info
|
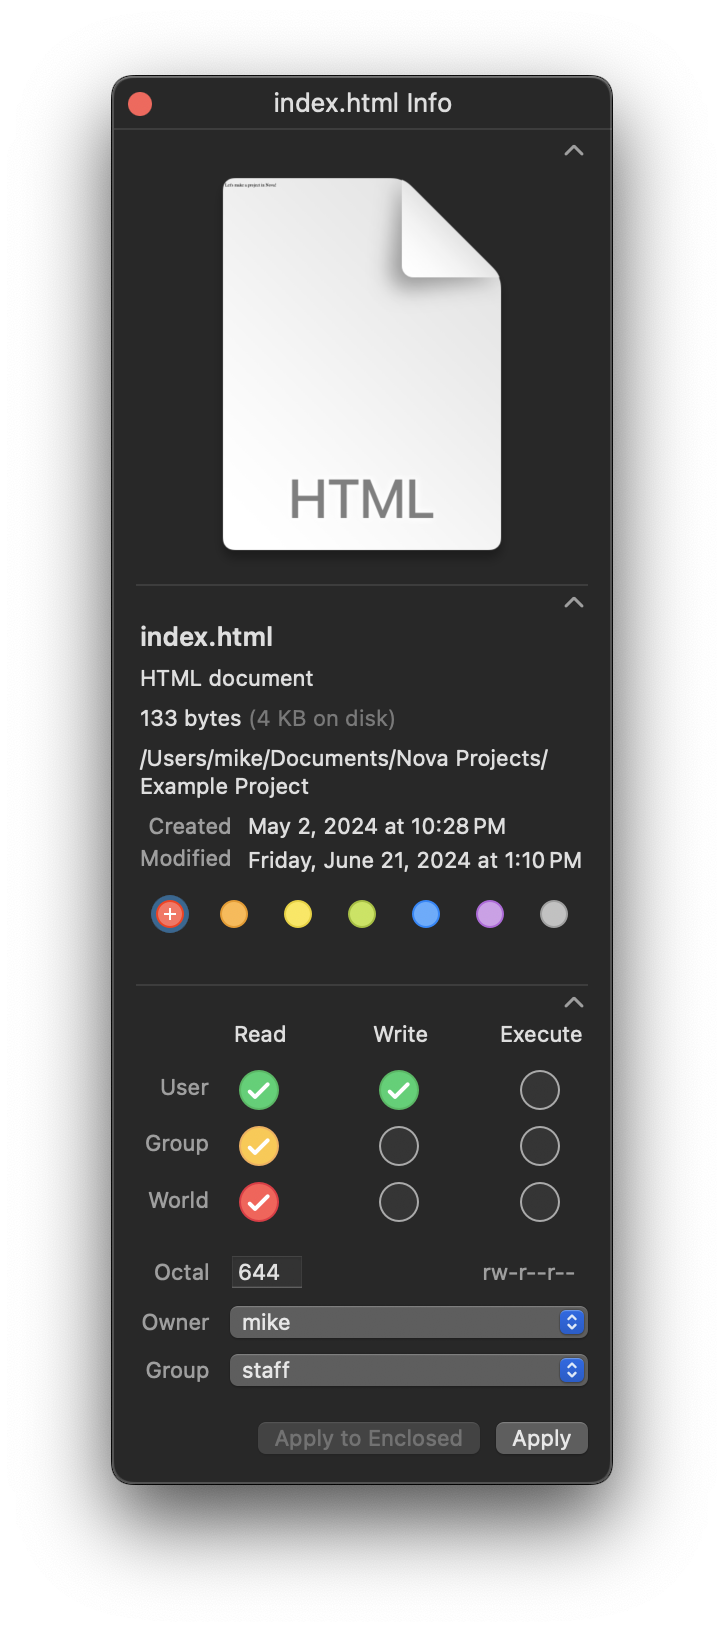
The Get Info window provides additional details about the file you’ve selected. It can be accessed from the context menu, or by pressing ⌘I (Command+I) after selecting a file or folder in the Files Sidebar. You can view the file or folder’s name, path, size on disk, creation date, and last modification date. You can also assign Finder tags by selecting a color. Get Info also allows you to view and edit file permissions, including who can read, write, and execute the file. After making changes, click Apply to apply them to the file you selected. If you are viewing a folder, you can select Apply to Enclosed to recursively change the permissions for all files contained within that folder. |
|
|
← Previous Command Palette |
Next → Open Quickly |