Publishing
Publishing is a Nova feature that allows you to track local changes to your project files as you work, then easily upload all those changes at once to a remote server when they’re ready to go live.
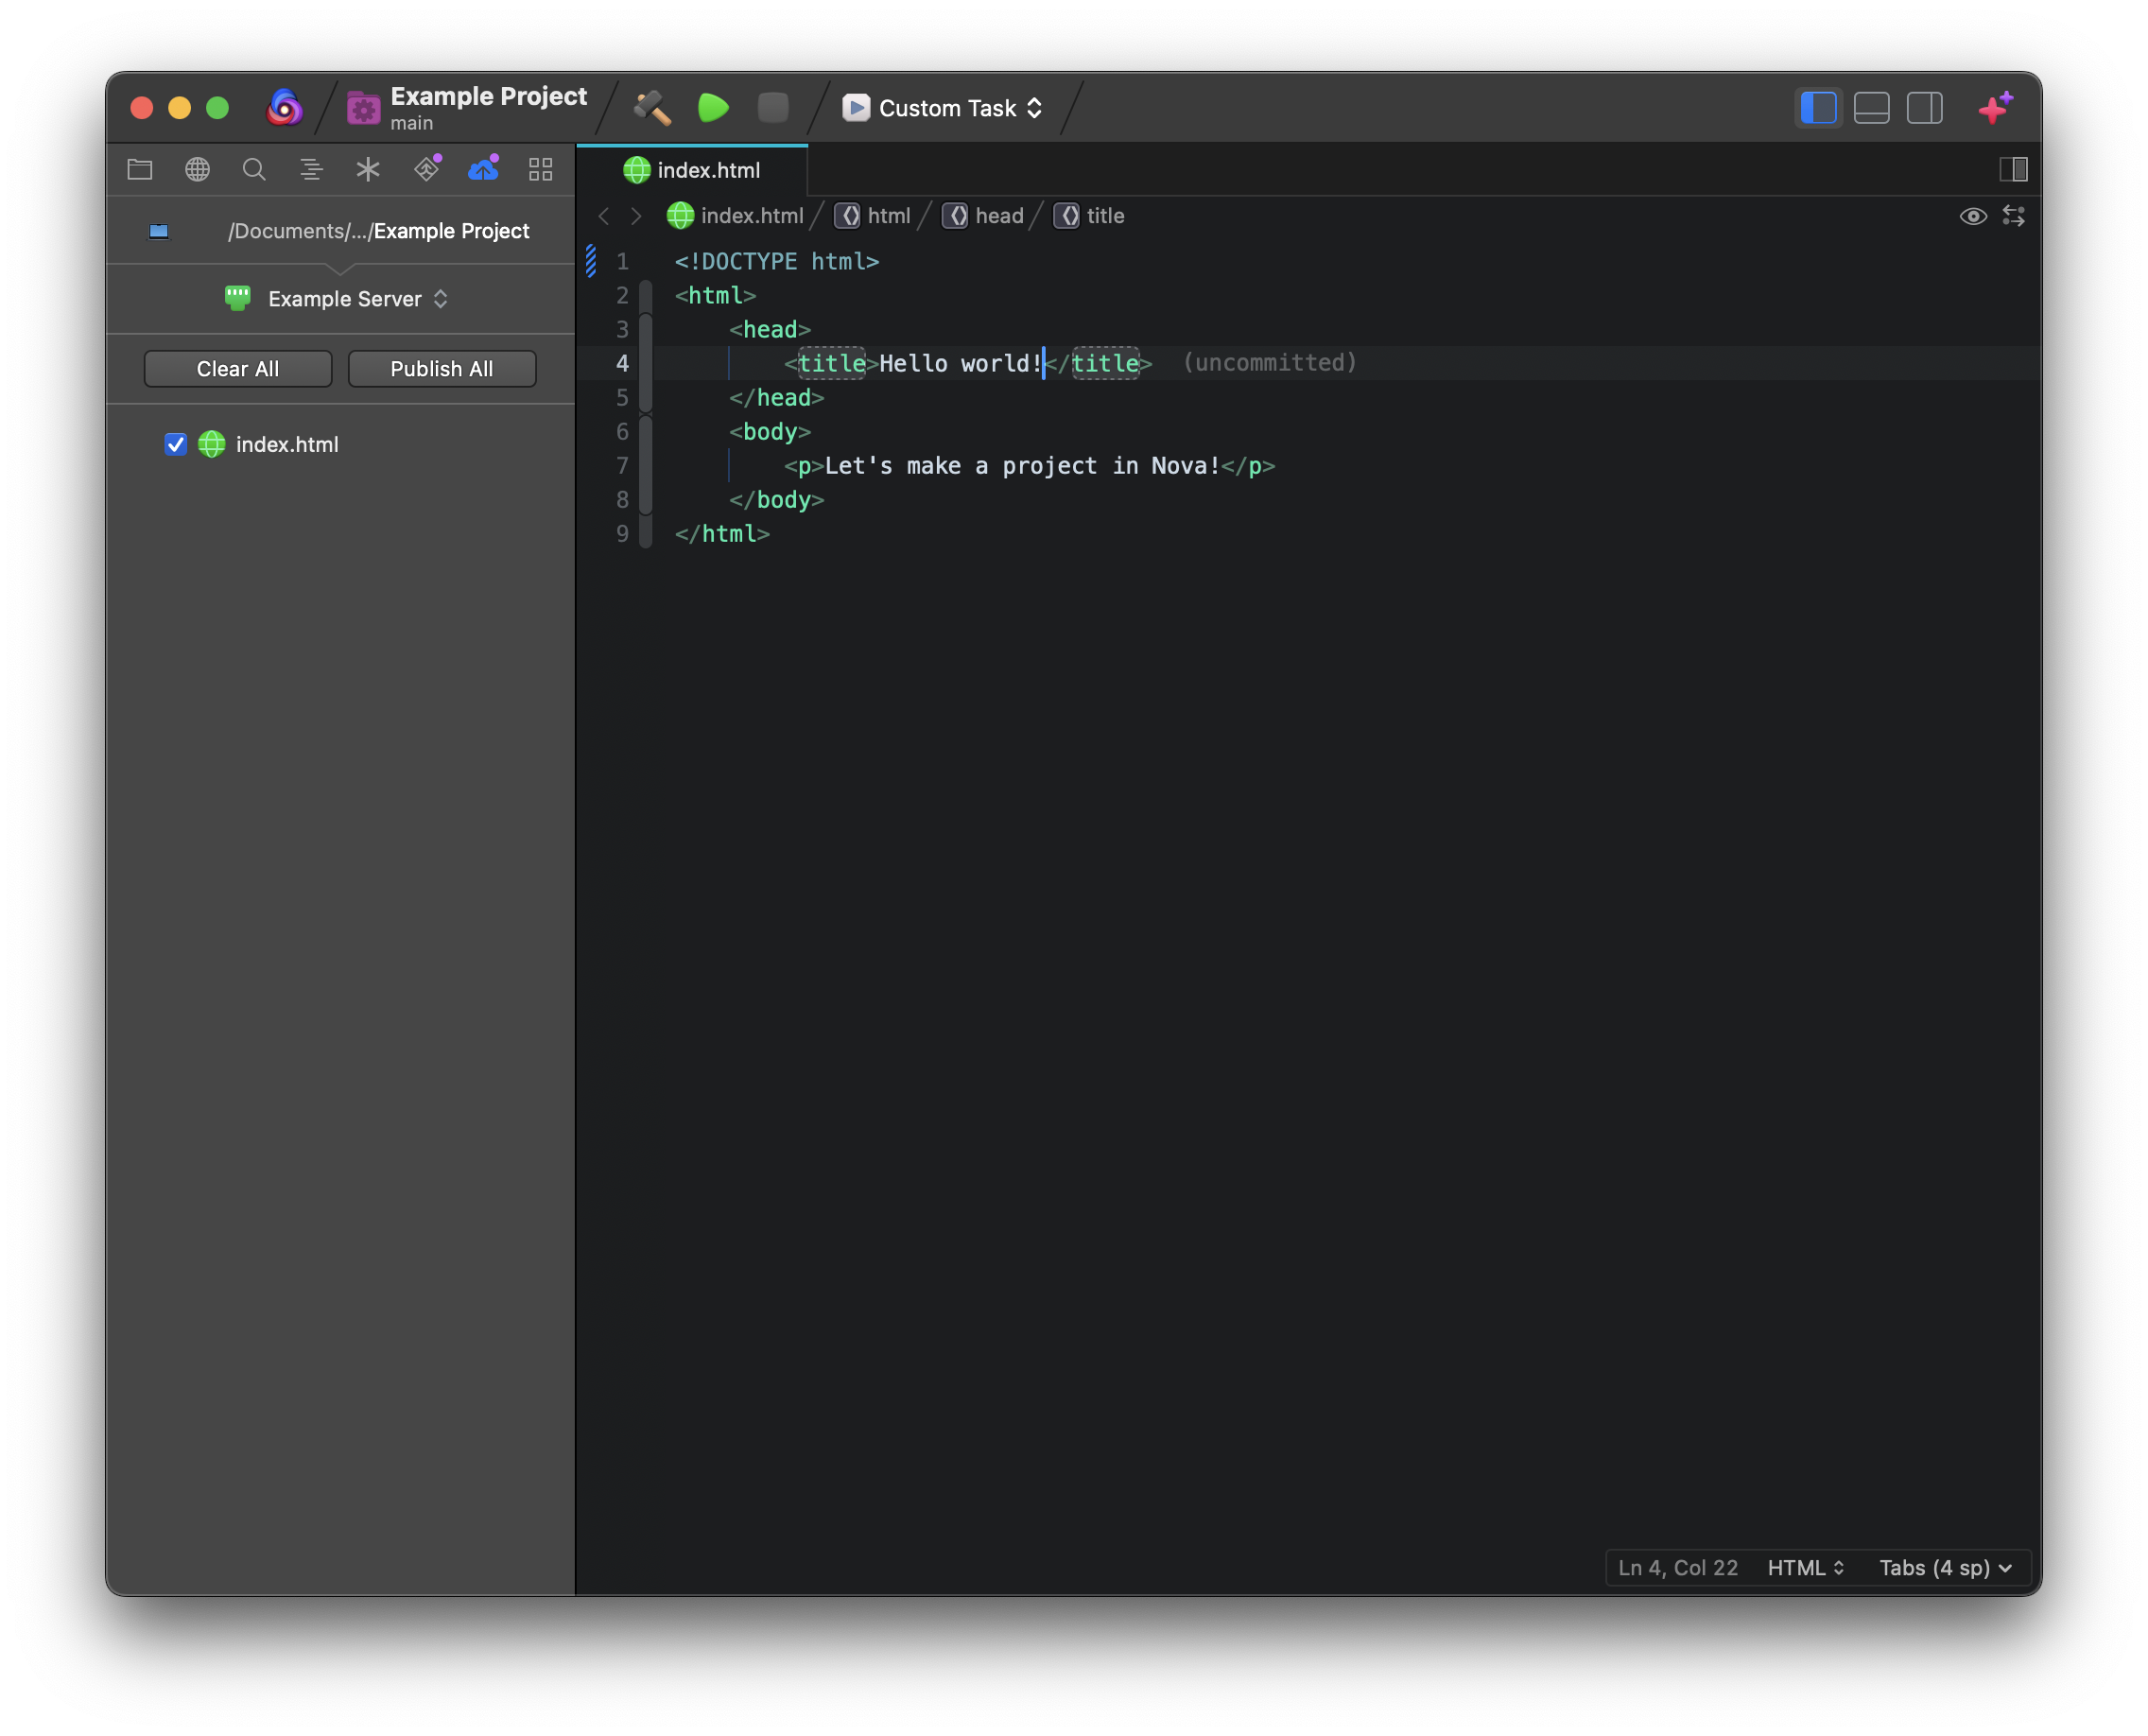
Publishing Setup
Publishing can be enabled in Local Projects with a Remote Files destination configured in Project Settings. Once you’ve added your server as a Remote Files destination, simply enable the Use Publishing option. You can add and enable Publishing for as many servers as needed.

Read More:
Using the Publish Sidebar
Once enabled, Nova will automatically keep track of any changes to your local project files, and queue them for Publishing in the Publish Sidebar.
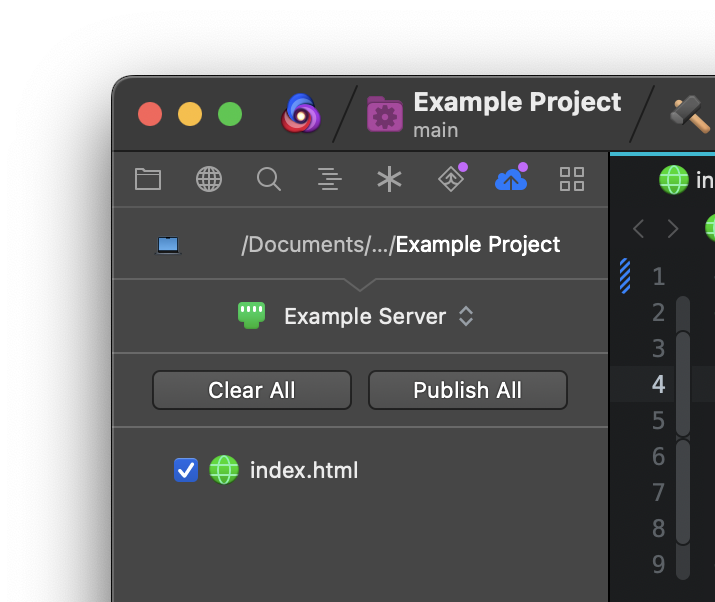
Along the top of the Publish Sidebar, you can select which server you want to publish to. This allows you to have multiple Remote File destinations in your project, and easily switch between them.
Once you’re ready, simply click Publish All to upload all of your local changes to the server. You can uncheck individual files that you don’t want to Publish if needed. You can publish only a particular file by right-clicking that file and choosing the Publish command from the context menu.
You can also click Clear All to reset the list of files queued for Publishing.
NOTE: This will completely clear the Changed Files list, and cannot be undone.
Publish Manually
In addition to having Nova queue changed files for you in the Publish Sidebar, it is also possible to manually queue or publish individual files.
In the Files Sidebar, right-click a file or folder to open the context menu. You’ll find a Publish submenu with a few options:
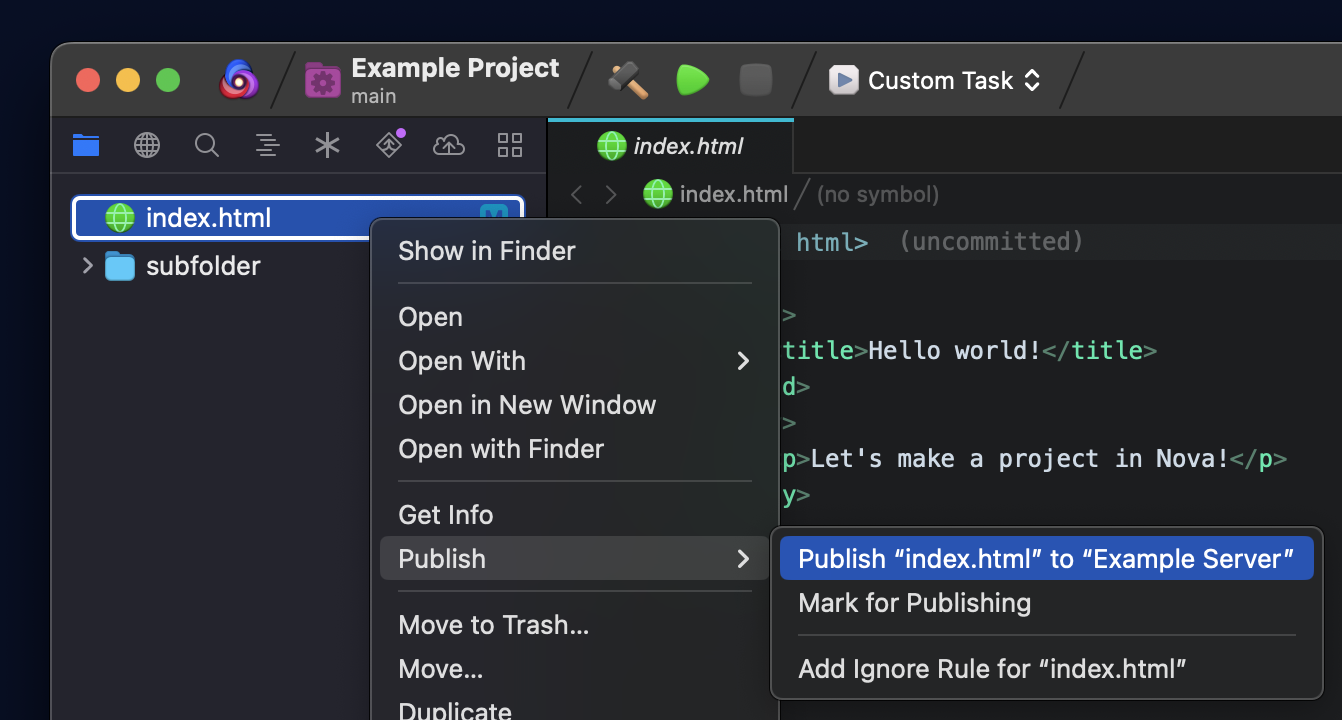
- Publish to Server
- Immediately publish the file to the remote server.
- Mark for Publishing
- Add the file to the Publishing queue, regardless of whether it has changed.
- Add Ignore Rule
- Ignore this file for Publishing. See below.
Advanced
Local & Remote Paths
Nova’s Publishing feature assumes that you have a local copy of your project on your Mac, and a remote copy of the project on your server, and that both copies share a common folder structure.
When selecting your destination server in Project Settings > Remote Files, you’ll find fields for Local and Remote Paths. These fields are used for mapping your local folder structure to your server’s folder structure when using Publishing.

By default, the Local Path will be treated as your project’s root folder, while the Remote Path will be treated as either your server’s root folder (ie, the initial folder that is opened upon connecting) or the folder set as its Remote Path in Settings > Servers. In other words, if these values are not changed, publishing /index.html from your project to your server will place it at /index.html on your server as well.
However, say your website has files that need to be compiled before uploading, such as Sass or template files, and these are compiled into a /dist folder within your project. You also have multiple websites on your server, and this particular site is stored in /websites/mysite.
Setting the local path to:
/dist
… and the remote path to:
/websites/mysite
… will ensure that Publishing /dist/index.html will upload it to /websites/mysite/index.html.
Ignoring Files
|
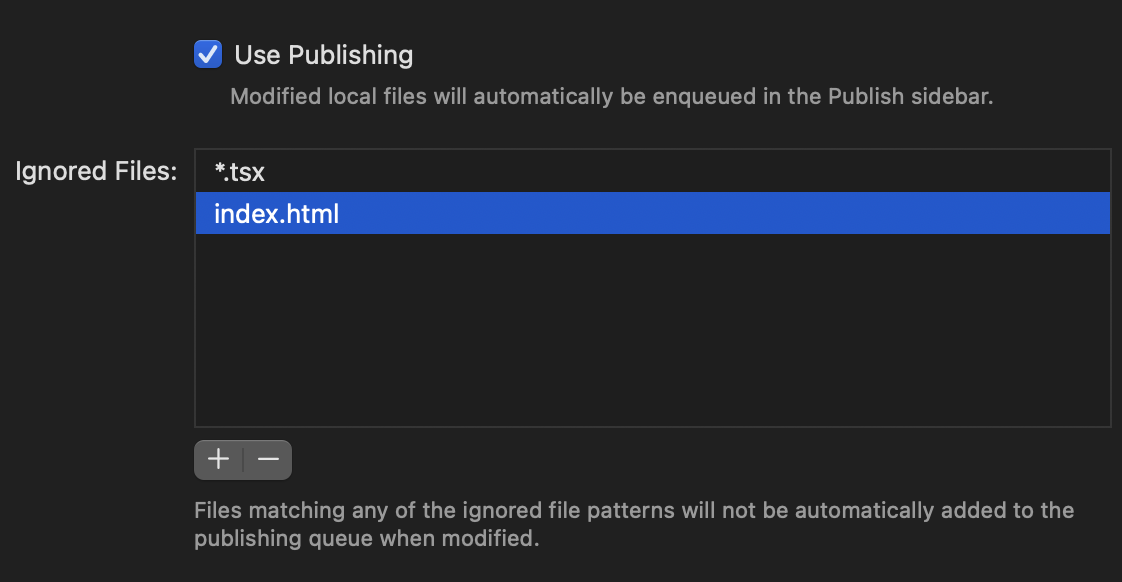
To prevent certain files in your project from being queued for Publishing, you can add an Ignore Rule for that file. Ignored files will not automatically appear in the Publish Sidebar even after being modified. Simply right-click the desired file in the Publish Sidebar and select Add Ignore Rule. You can also find this option in the Files Sidebar. From a file’s context menu, select Publish > Add Ignore Rule. |
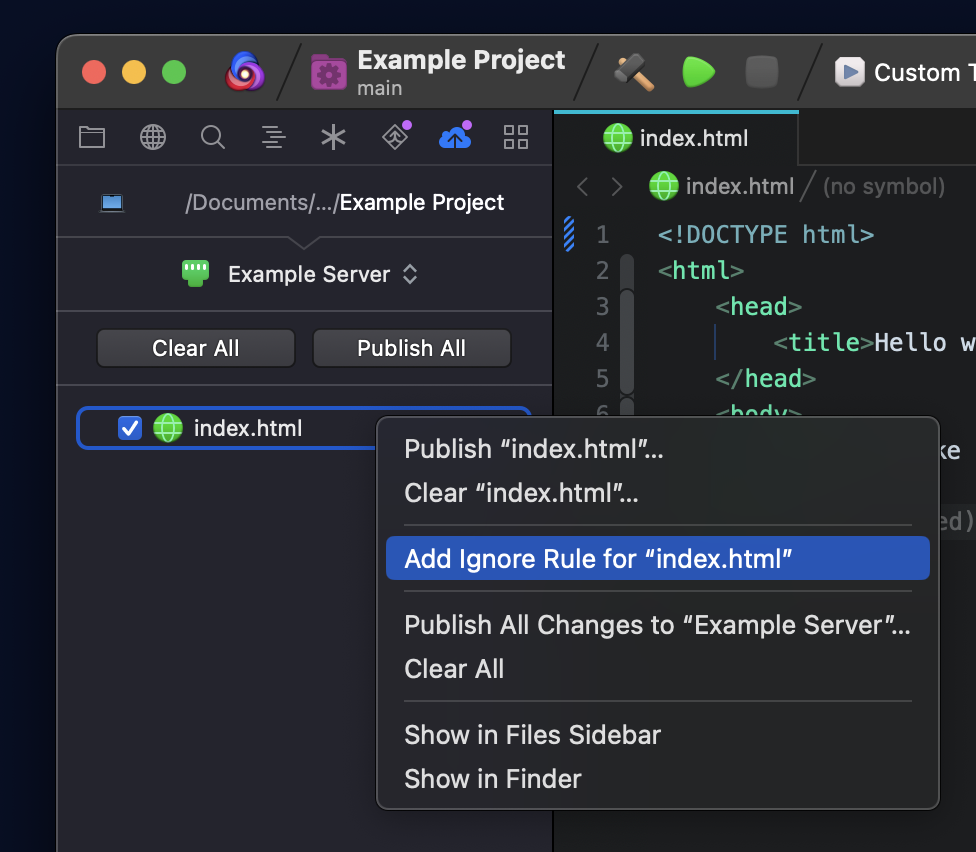
|
Once you’ve added an ignore rule, it will appear in Project Settings in the Ignored Files list for your server. You can remove rules from the list here if needed, or manually type ignore rules as glob patterns. For instance, you can ignore all .tsx files from Publishing by adding *.tsx as an Ignore Rule.
NOTE: The ignore list for Publishing is separate from the ignore list for indexing found in Project Settings > Project.
Reverse Publishing
When viewing your remote files in the Remote Sidebar, you can use Reverse Publish to download a file or folder to its corresponding location in your local project. To do this, right-click the desired file in the Remote Sidebar and select Publish > Reverse Publish from the context menu.
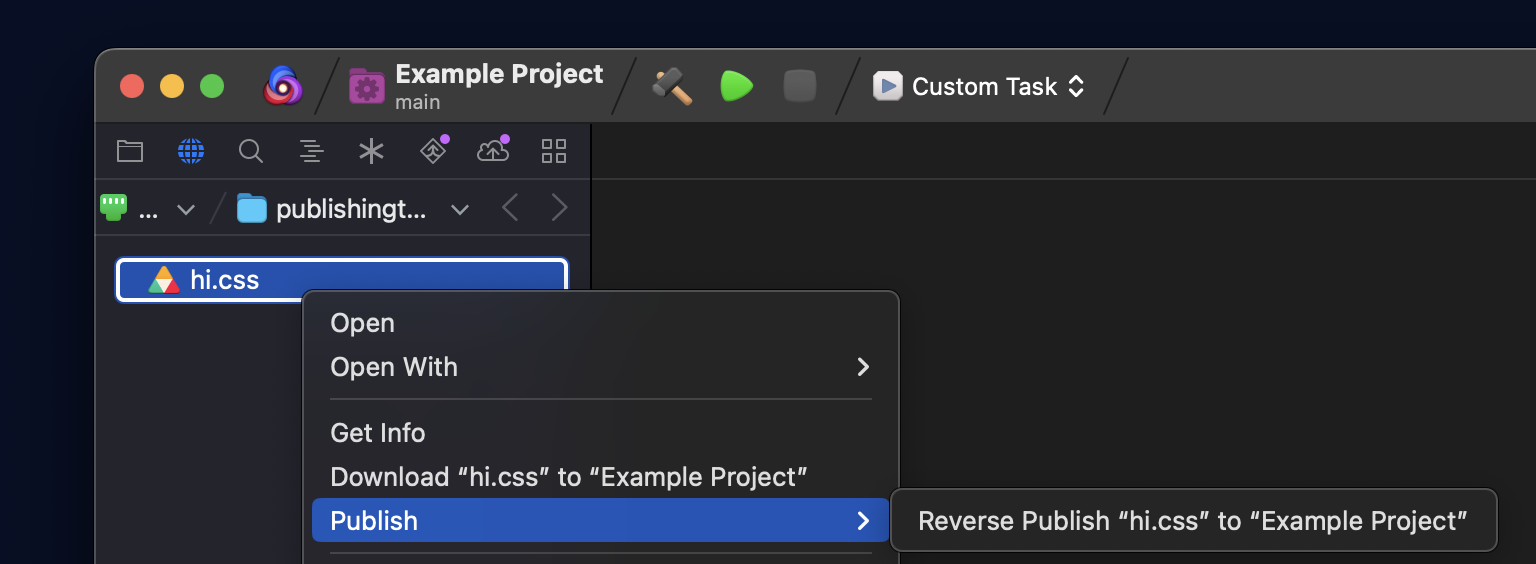
Just like normal Publishing, Reverse Publish uses the Local and Remote Paths you specified to map your remote directory structure to your project’s local folder and download your remote files to the correct location.
Menu Items & Key Bindings
Menu items for Publishing features can be found in the Project menu > Publish, including options for publishing the current file, publishing all files, and using Reverse Publish for the current file. You can also use File > Save & Publish to save the current file and Publish it to your server in one command.
By default, the following Publishing commands have key bindings:
- ⌥⌘P (Option+Command+P): Publish the current file.
- ⌃⌘P (Control+Command+P): Publish All.
- ⌃⌘S (Control+Command+S): Save & Publish.
Other menu items can be bound to key shortcuts in Settings > Key Bindings.
|
← Previous Remote Sidebar |
Next → File Browser |