Quick Tour
Now that you’re through with the initial setup process, this article will take you on a, well, quick tour of Nova’s interface and feature set. In each section, feel free to follow the links for more detailed information about each feature.
The Launcher
After setting up Nova, the first interface you’ll be introduced to is the Launcher. From the Launcher, you can open and organize existing Projects in Nova, create new Projects, clone Git repositories, or simply create a new document.
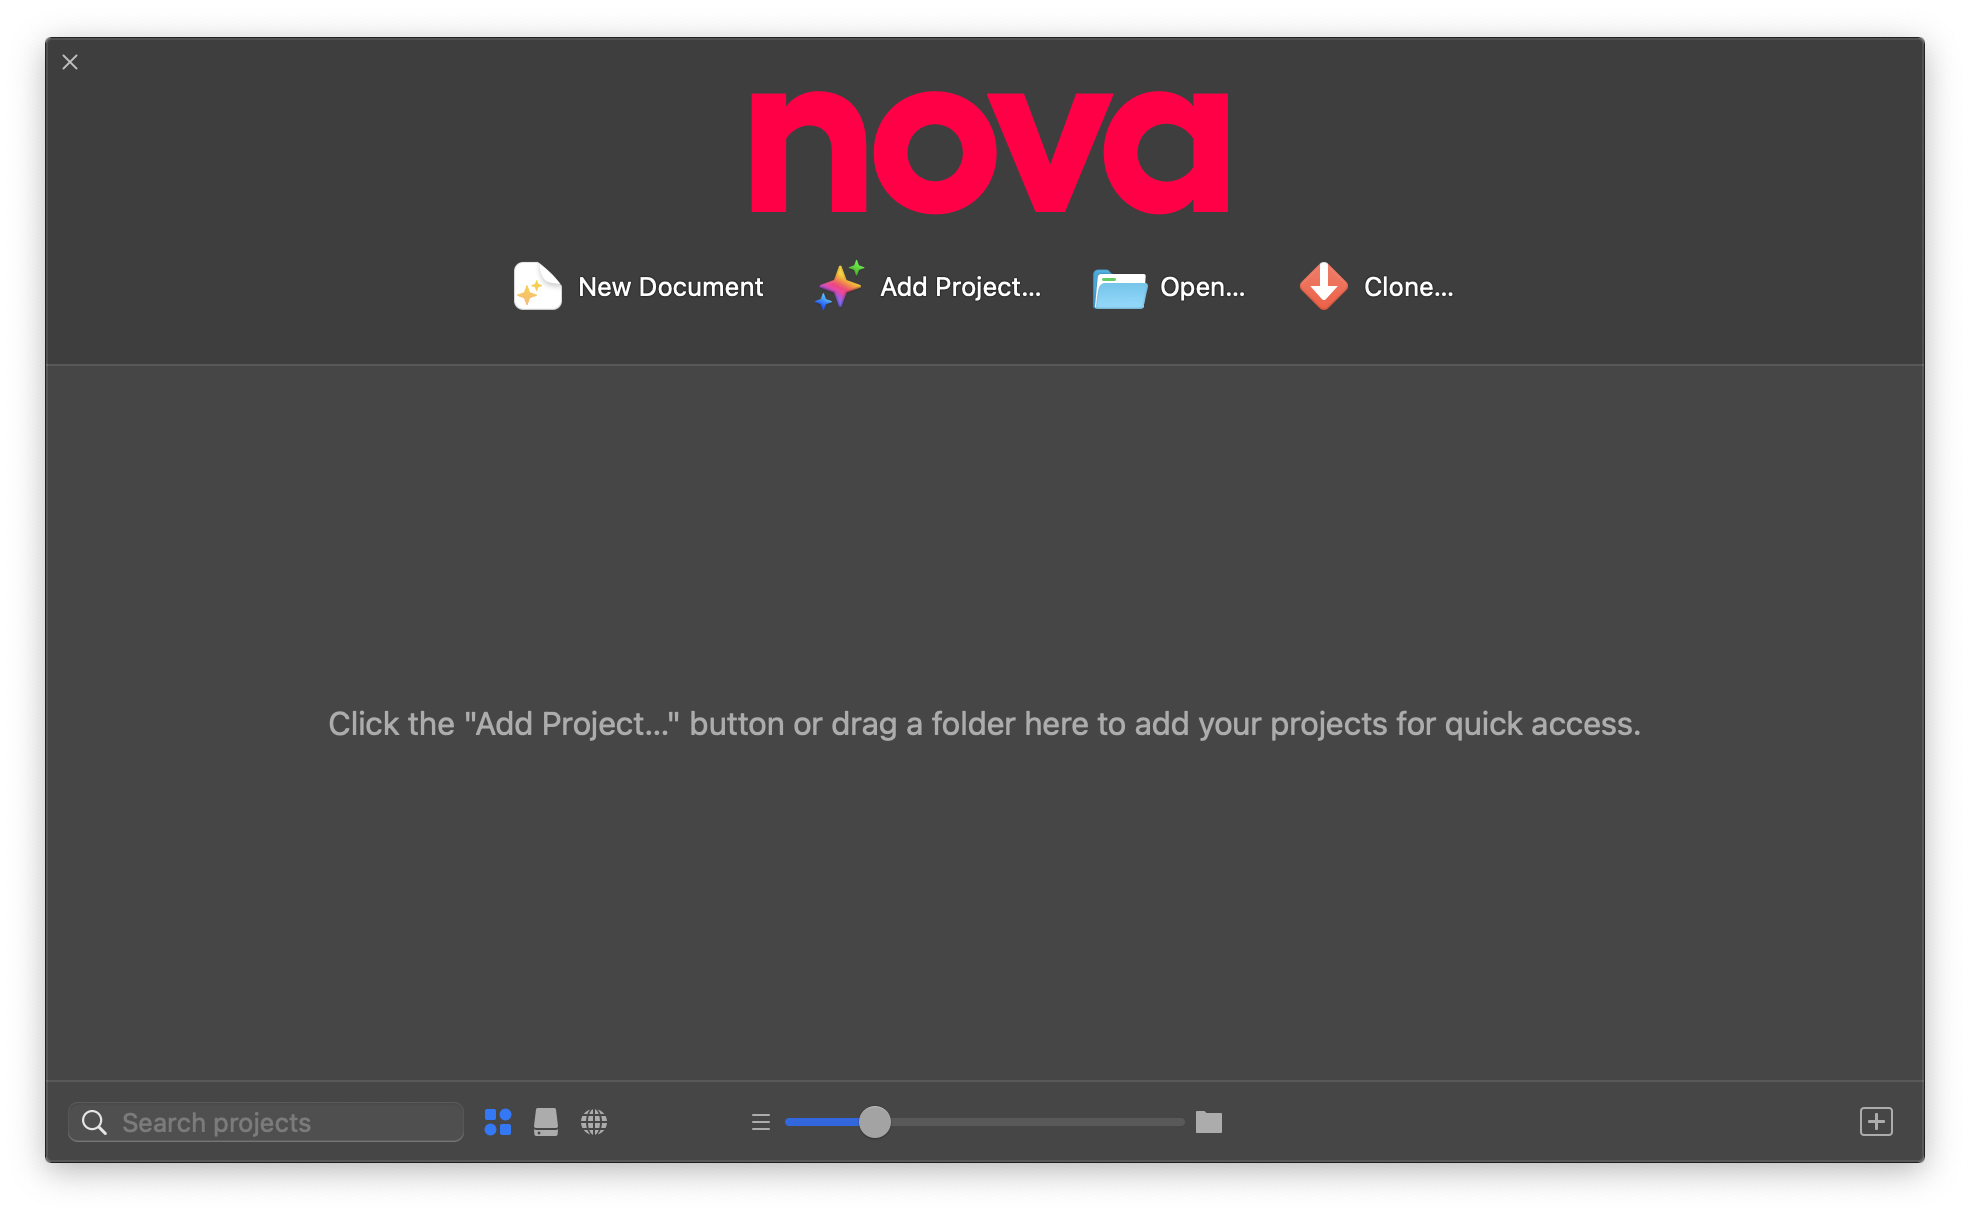
Creating a Project
As an example, let’s create a project from Add Project > New Project.
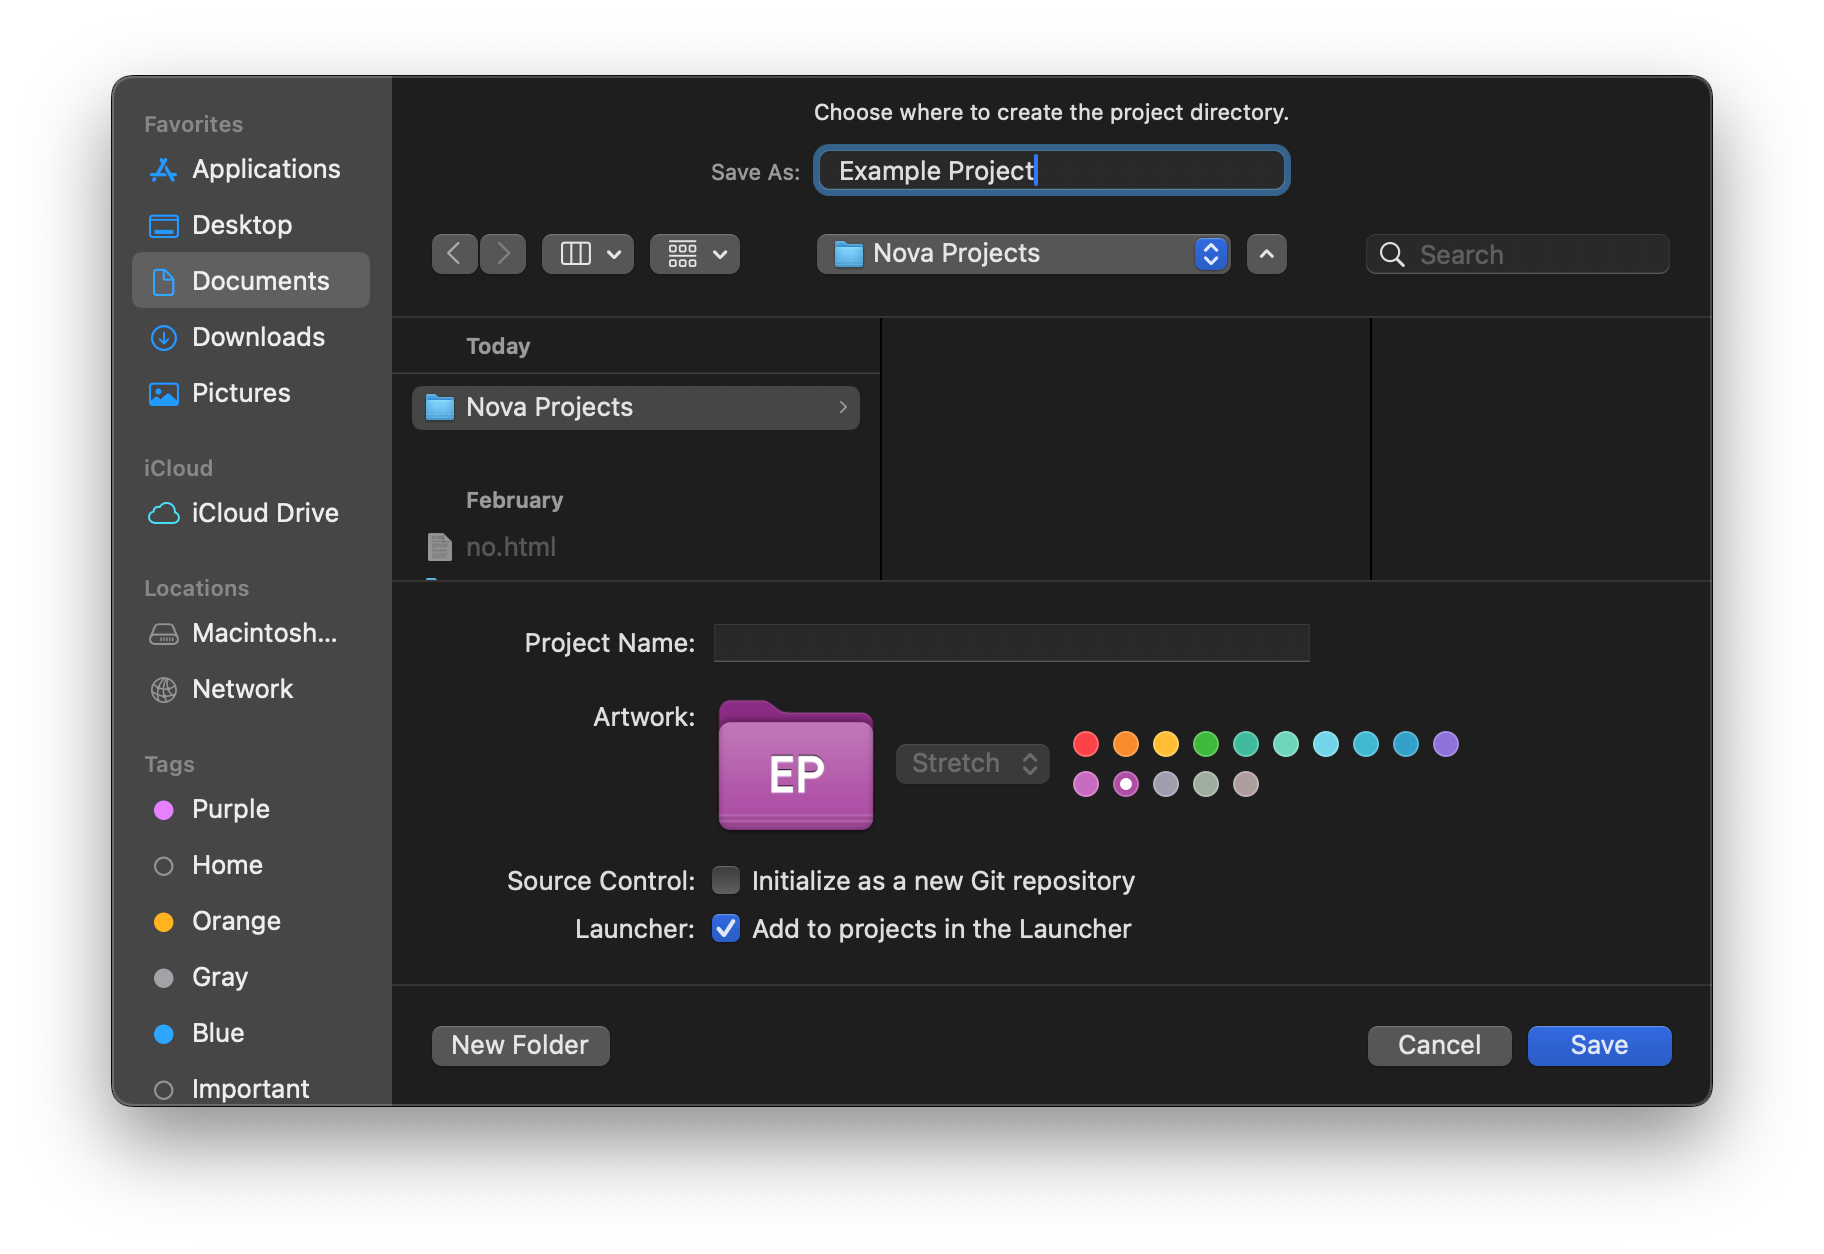
Nova Projects are essentially local folders on your Mac, which contain a hidden /.nova directory for project-specific data. The Project Name is simply a display name shown in the Launcher, and does not have to match the name of the folder. You can also customize how the Project will appear in the Launcher by choosing a custom color.
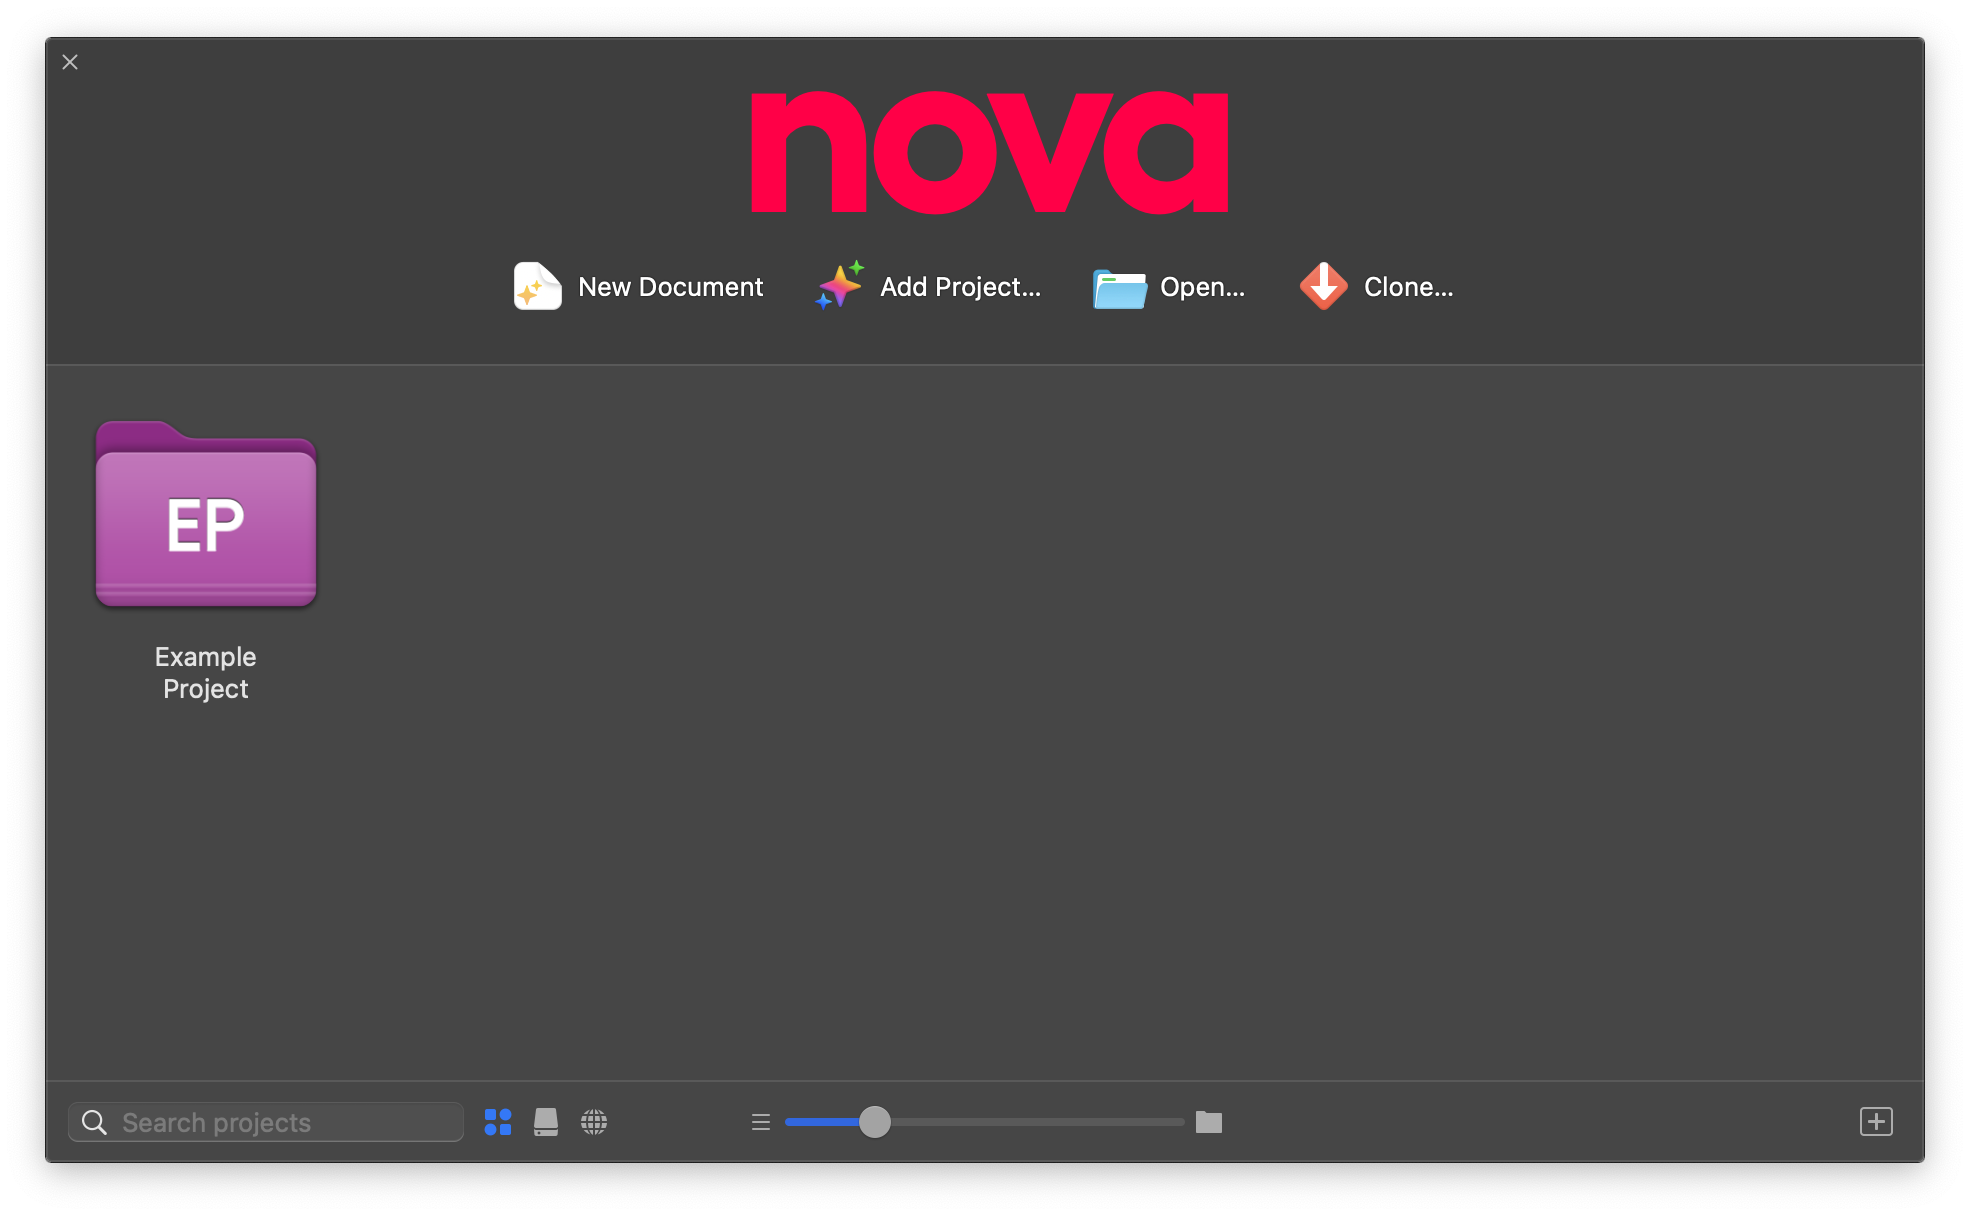
Since we’ll also want to use Git functionality in this project, let’s go ahead and check Initialize as a new Git repository as well. Once created, the project will appear as an icon in the Launcher, which you can double-click to open.
The Workspace
Once you’ve created a project, it will open in Nova’s main interface, the Workspace.
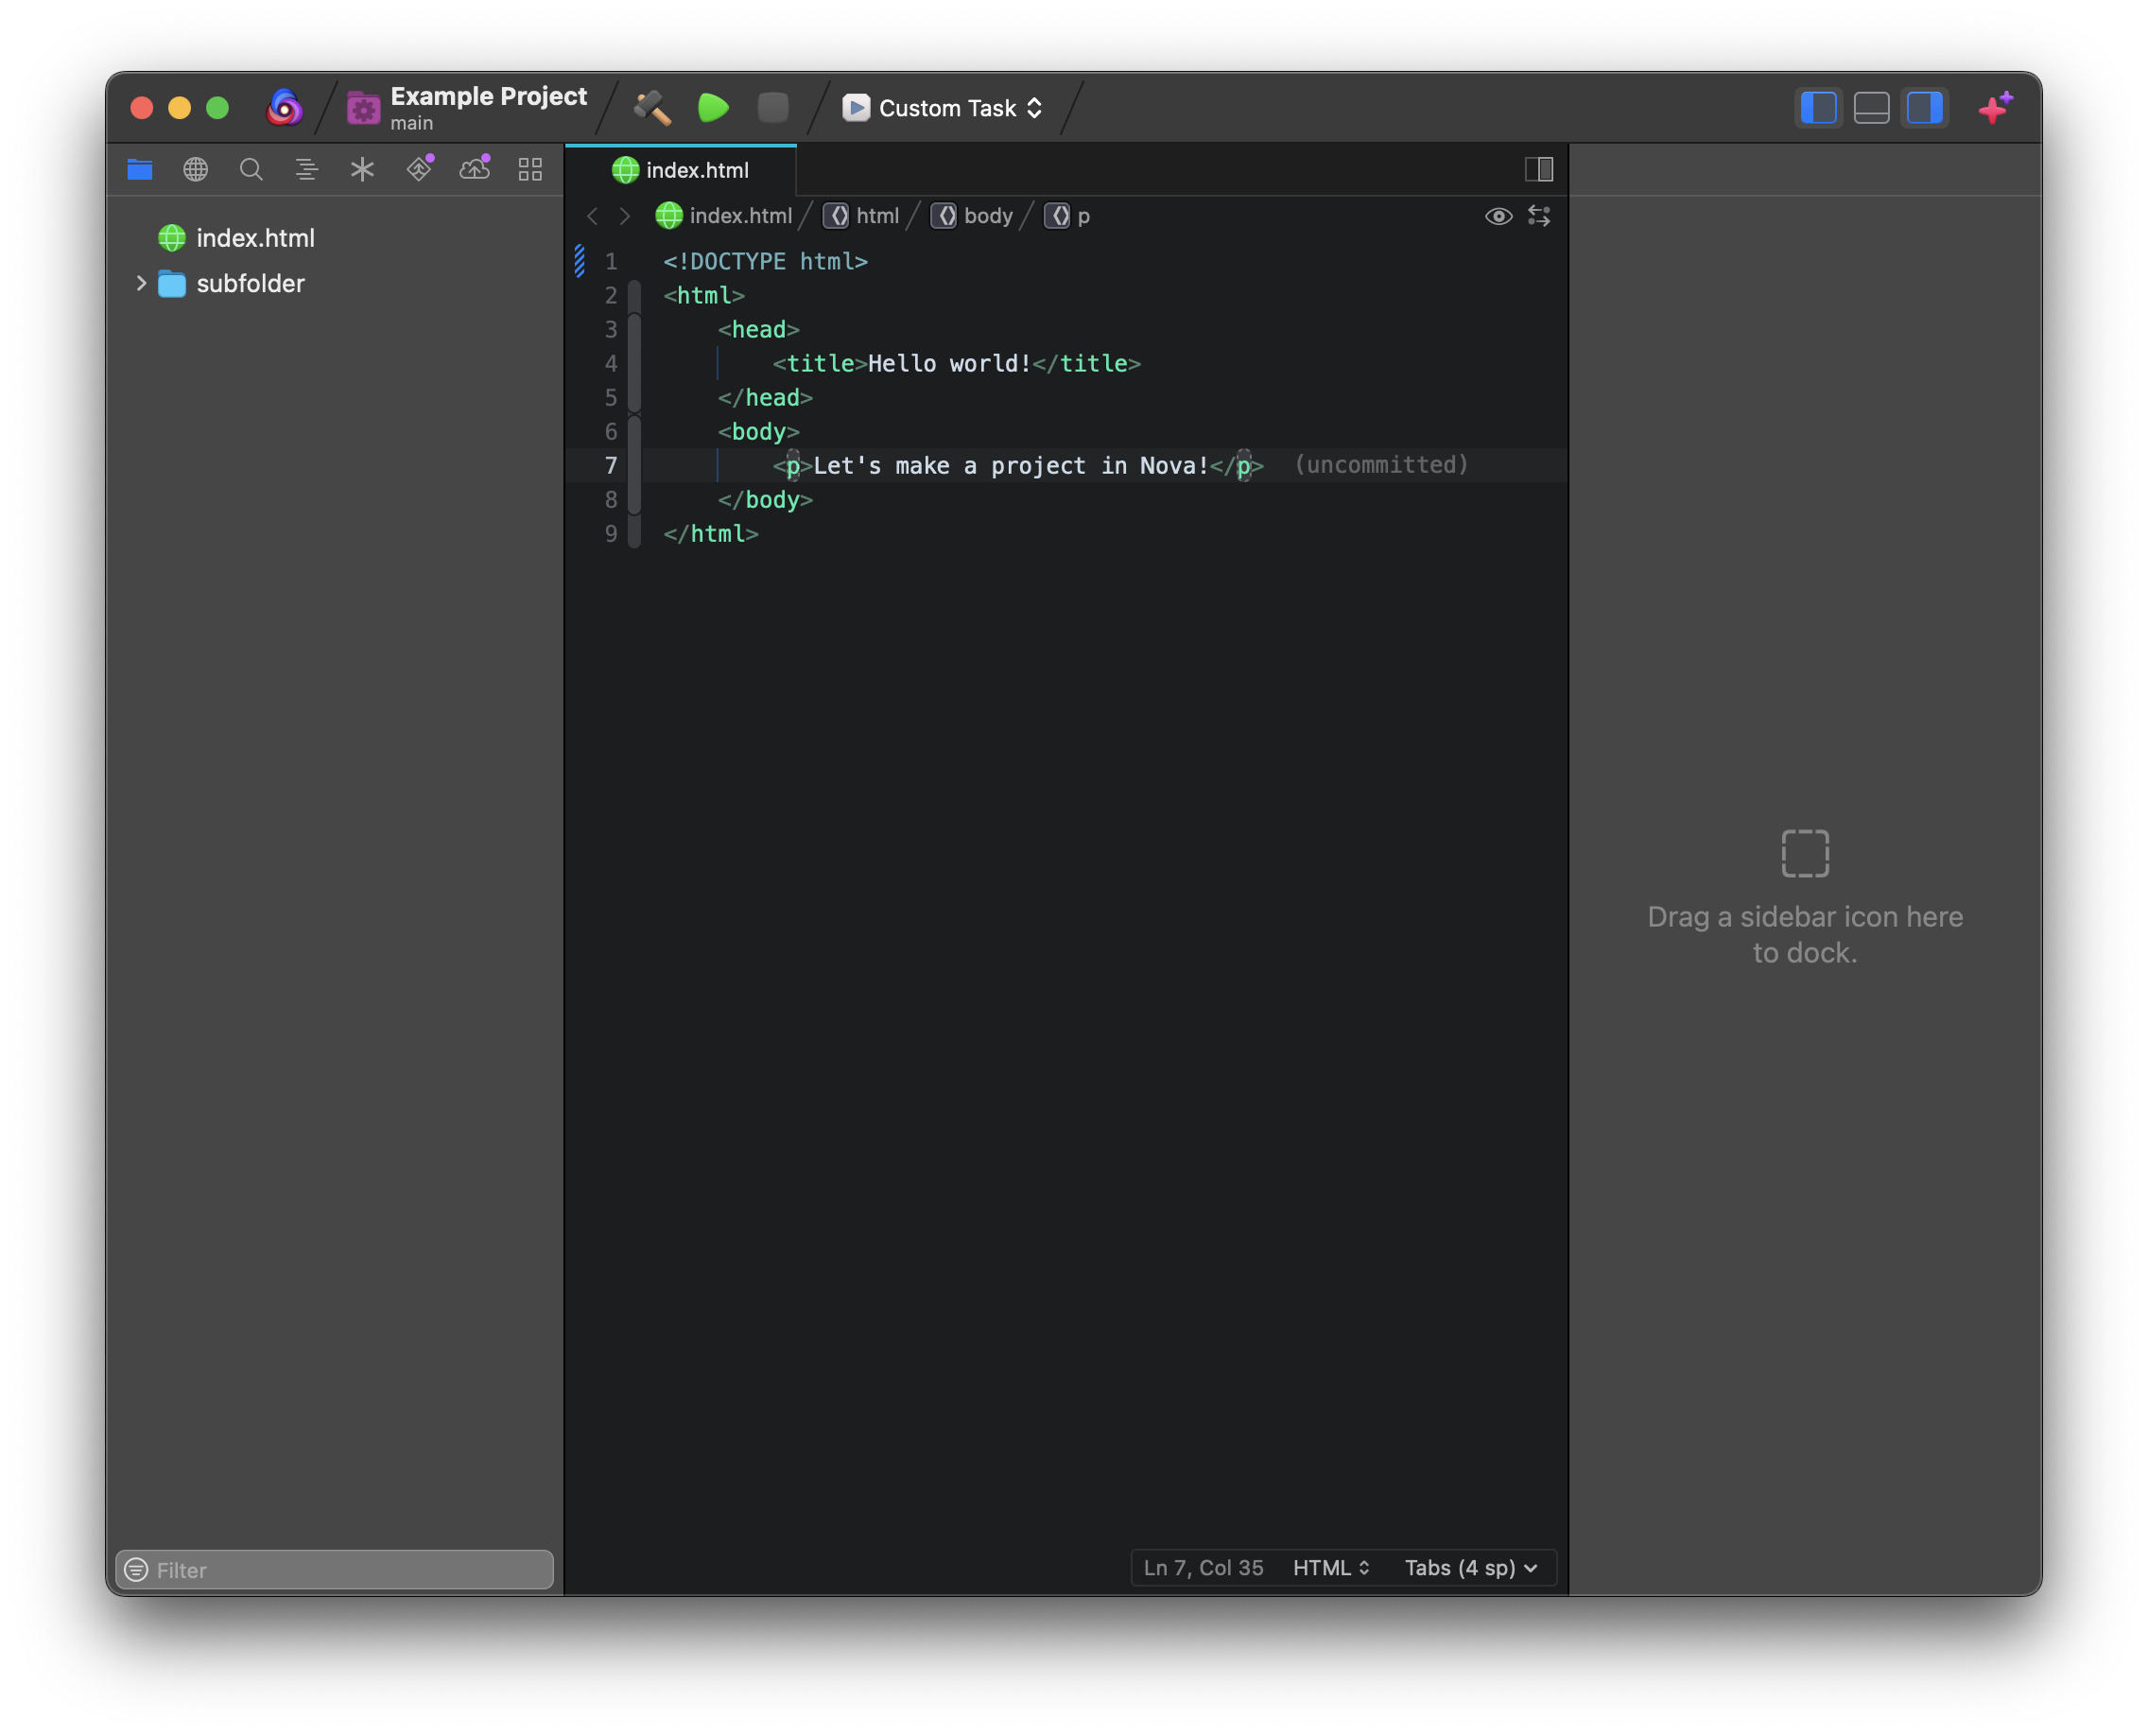
Every project opens in its own Workspace, which can either appear as their own separate windows or as tabs depending on the setting chosen in Settings > Workspace. Projects are tied to a single Workspace window, so documents in a project folder will always open in that project’s Workspace window, and can’t be accidentally opened or moved into other windows.
On the left and right sides of the Workspace are sidebars, which provide easy access to files in your project, files on remote servers, the ability to search and replace text across your project, and more. There are both left and right sidebars, whose visibility can be toggled using the ![]() and
and ![]() controls in the toolbar.
controls in the toolbar.
NOTE: By default, the right sidebar actually doesn’t contain any Sidebars! You can drag sidebar icons from the Sidebar Dock along the top of each sidebar to move them to the other sidebar, or just hide a Sidebar if you don’t intend to use it.
Right in the middle of the Workspace is the main Content Area, where all your tabs live. This includes your Editor tabs, Preview tabs, Terminal tabs, and File Browsers. Open any of these tabs from the ![]() New Tab button in the toolbar.
New Tab button in the toolbar.
The Content Area can also be split into multiple views, letting you see Previews side-by-side with your code, or keep a Terminal at the bottom of your window. Just drag a tab from the tab bar to the position you want to create a split, or click the New Split button in the tab bar.
Open Quickly
Once you’ve created files in your project, you can of course open them from the sidebar. But if you already (roughly) know the name of the file you need, you can get to it faster with Open Quickly. Just press ⇧Shift+⌘Command+O to quickly open Open Quickly.

Type the name of the file you want and press Return to open it. Open Quickly supports fuzzy-matching, so you don’t necessarily need to type the exact filename or path. Open Quickly can also find symbols in your project, if you need to find where a particular function or variable is defined.
Command Palette
In addition to various graphical controls and menu items in Nova, you can also use the Command Palette to access basically any command in Nova right from your keyboard. Just press ⇧⌘P (Shift+Command+P) to open the Command Palette, type what action you want to perform, and press Return to make it happen. Basically every menu item in Nova and more is accessible here.

Editor
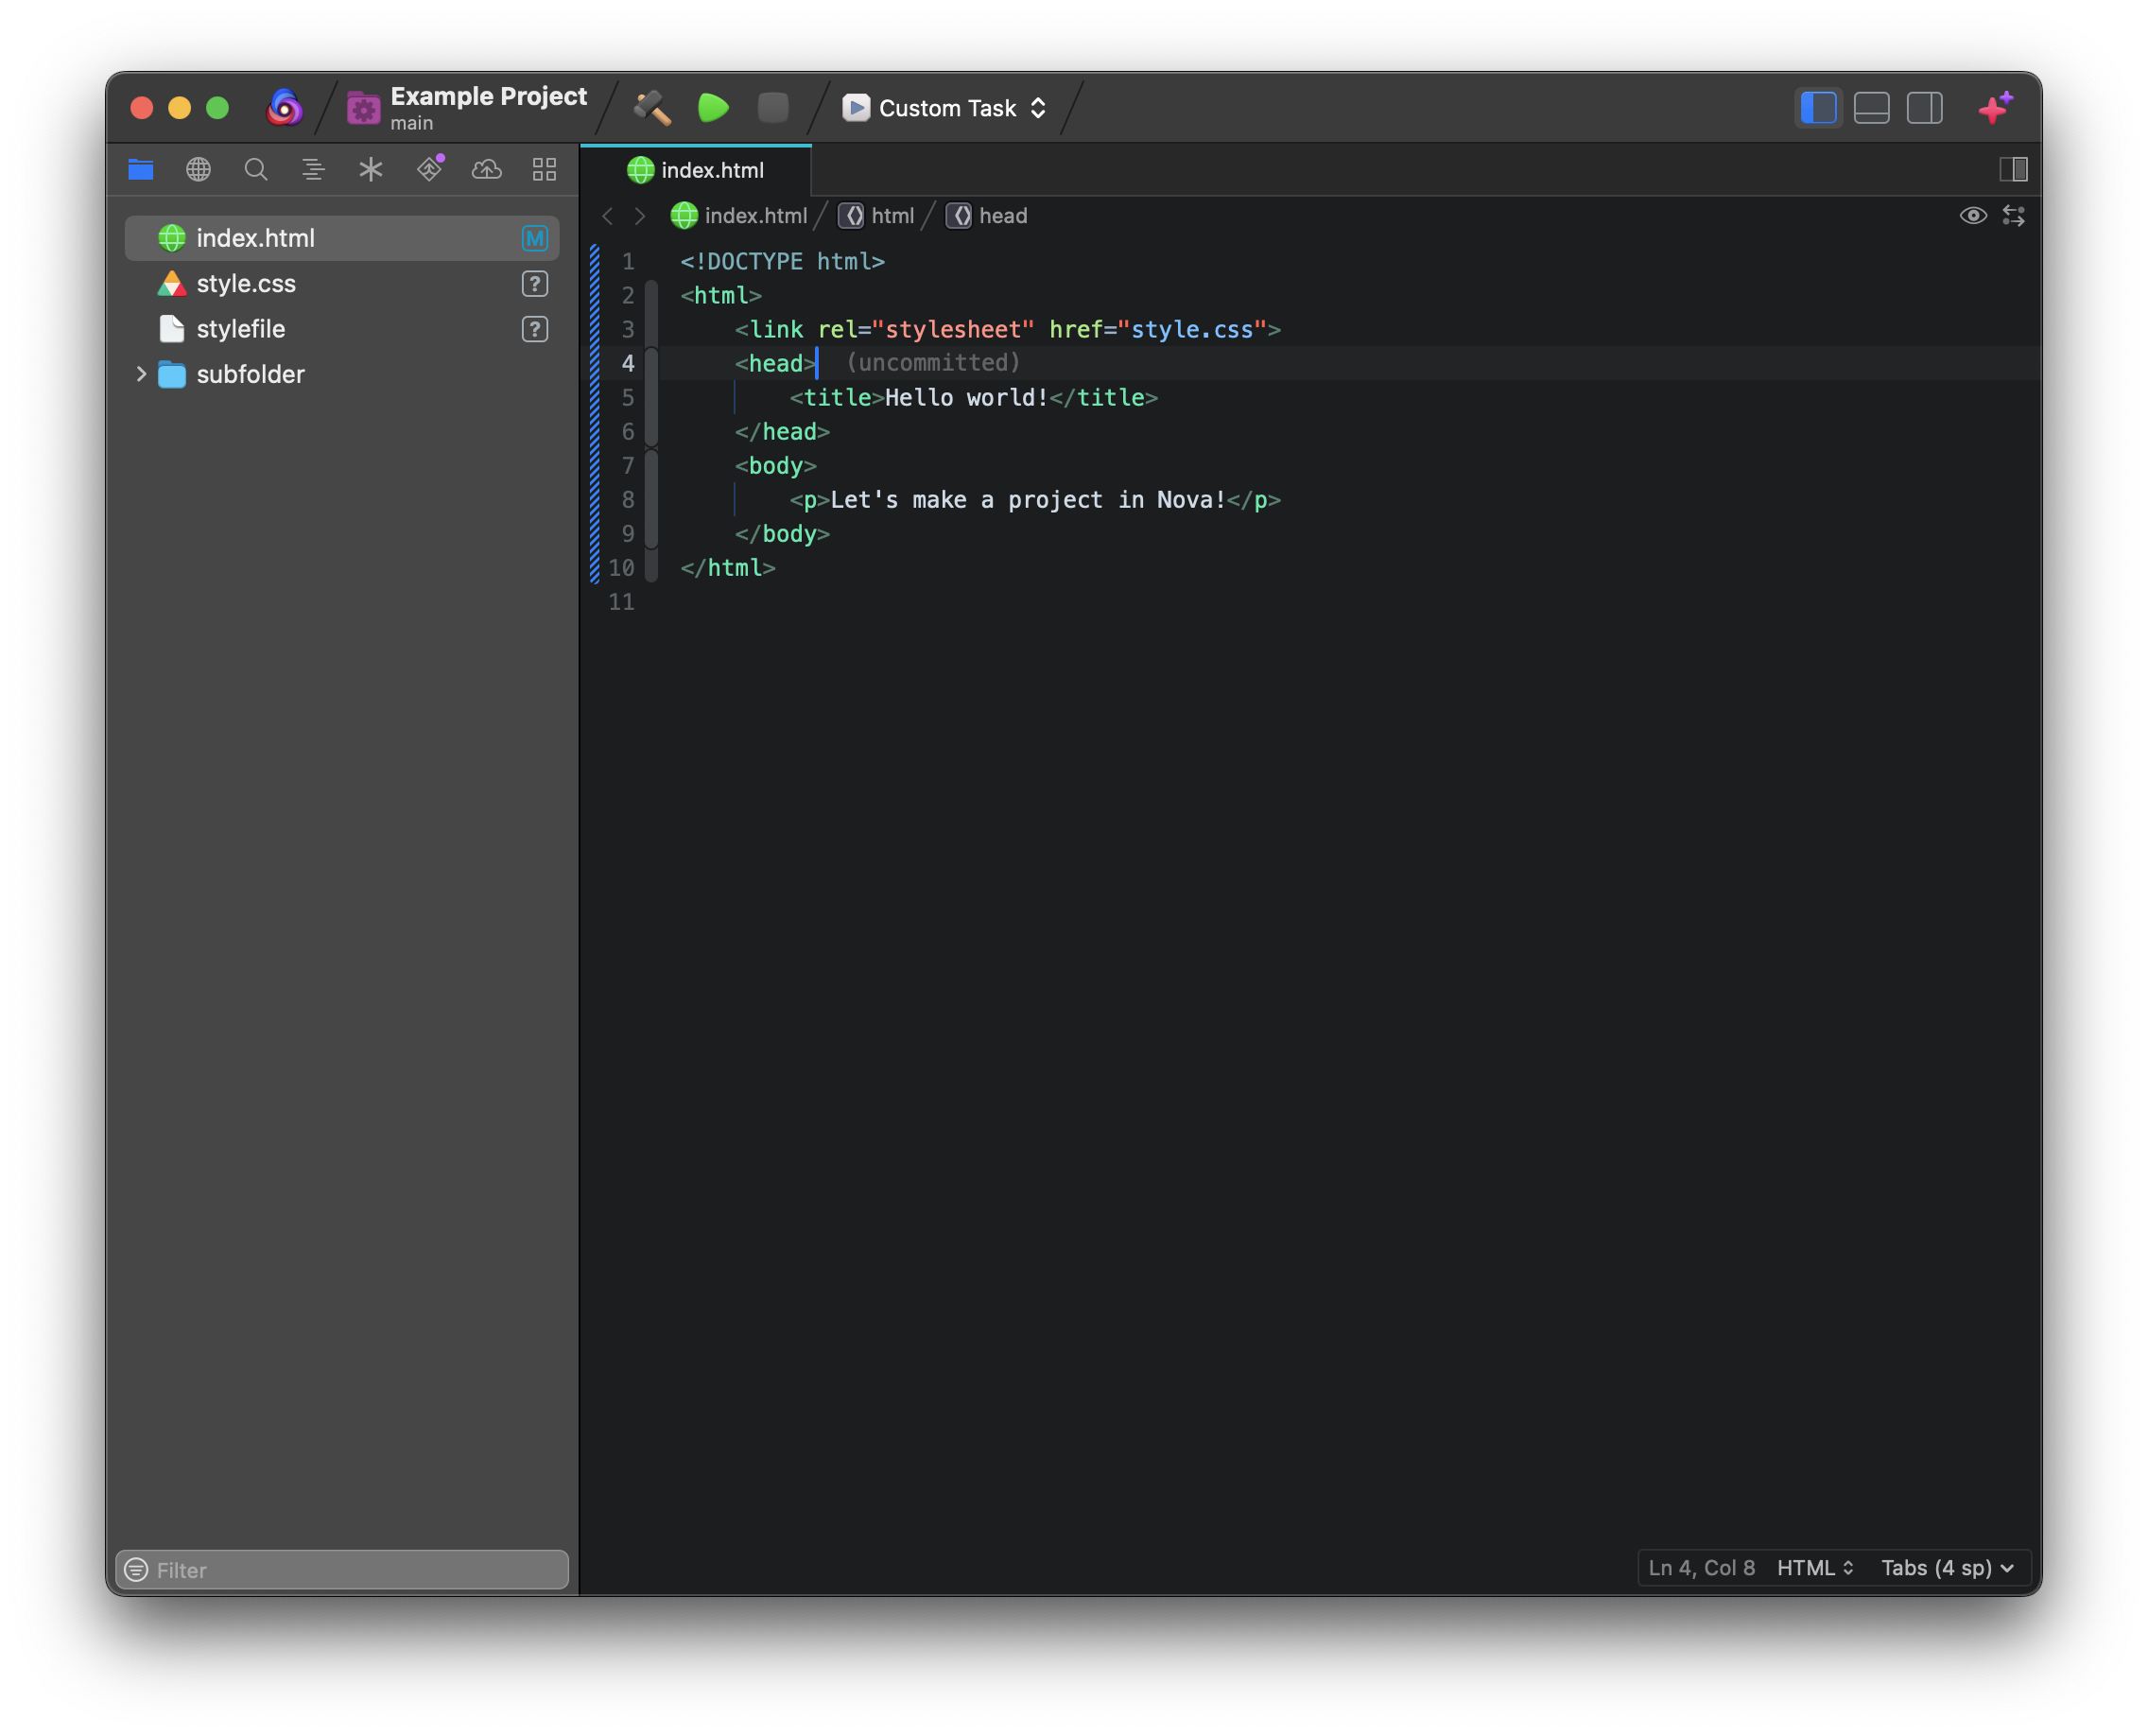
Nova’s Editor is the main way you’ll interact with documents in Nova. Nova’s feature-packed editor provides highlighting and completions for a range of supported syntaxes, with even more available as Extensions. The editor supports a wide range of modern features, including support for a minimap, multiple cursors, code structure headers, and even a dedicated Vim mode.
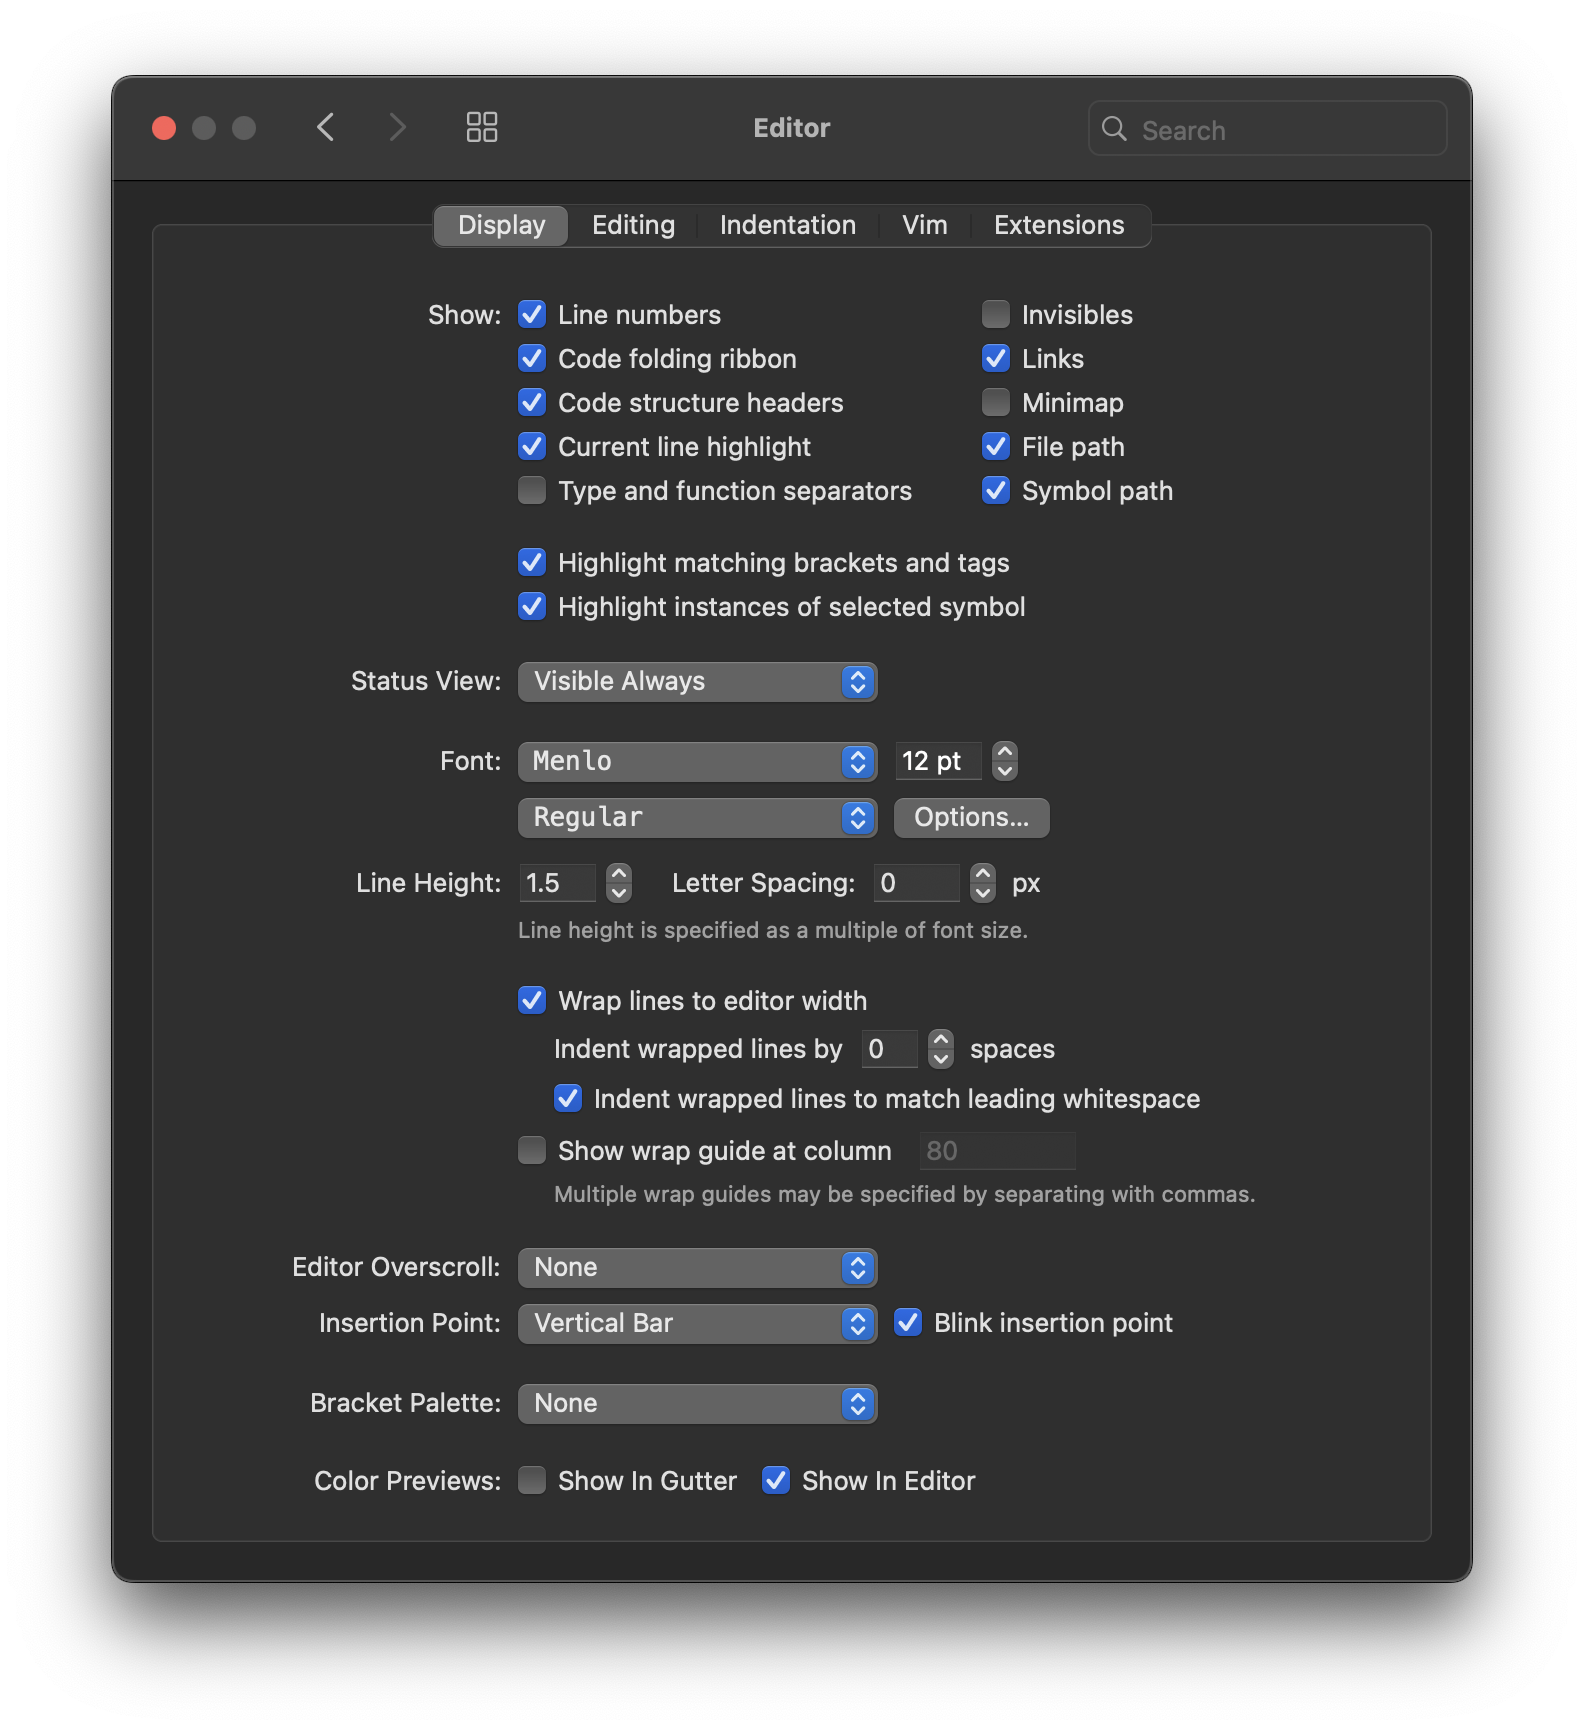
The editor is also immensely configurable, with a convenient graphical interface for adjusting settings. You can change themes, use a custom font, show invisible characters, set preferences for indentation styles, and much more.
Previews
While editing a document in Nova, click the icon in the editor path bar to open the document in a Preview tab. Nova’s Preview feature allows you to see a live rendered view of your web projects or Markdown documents.
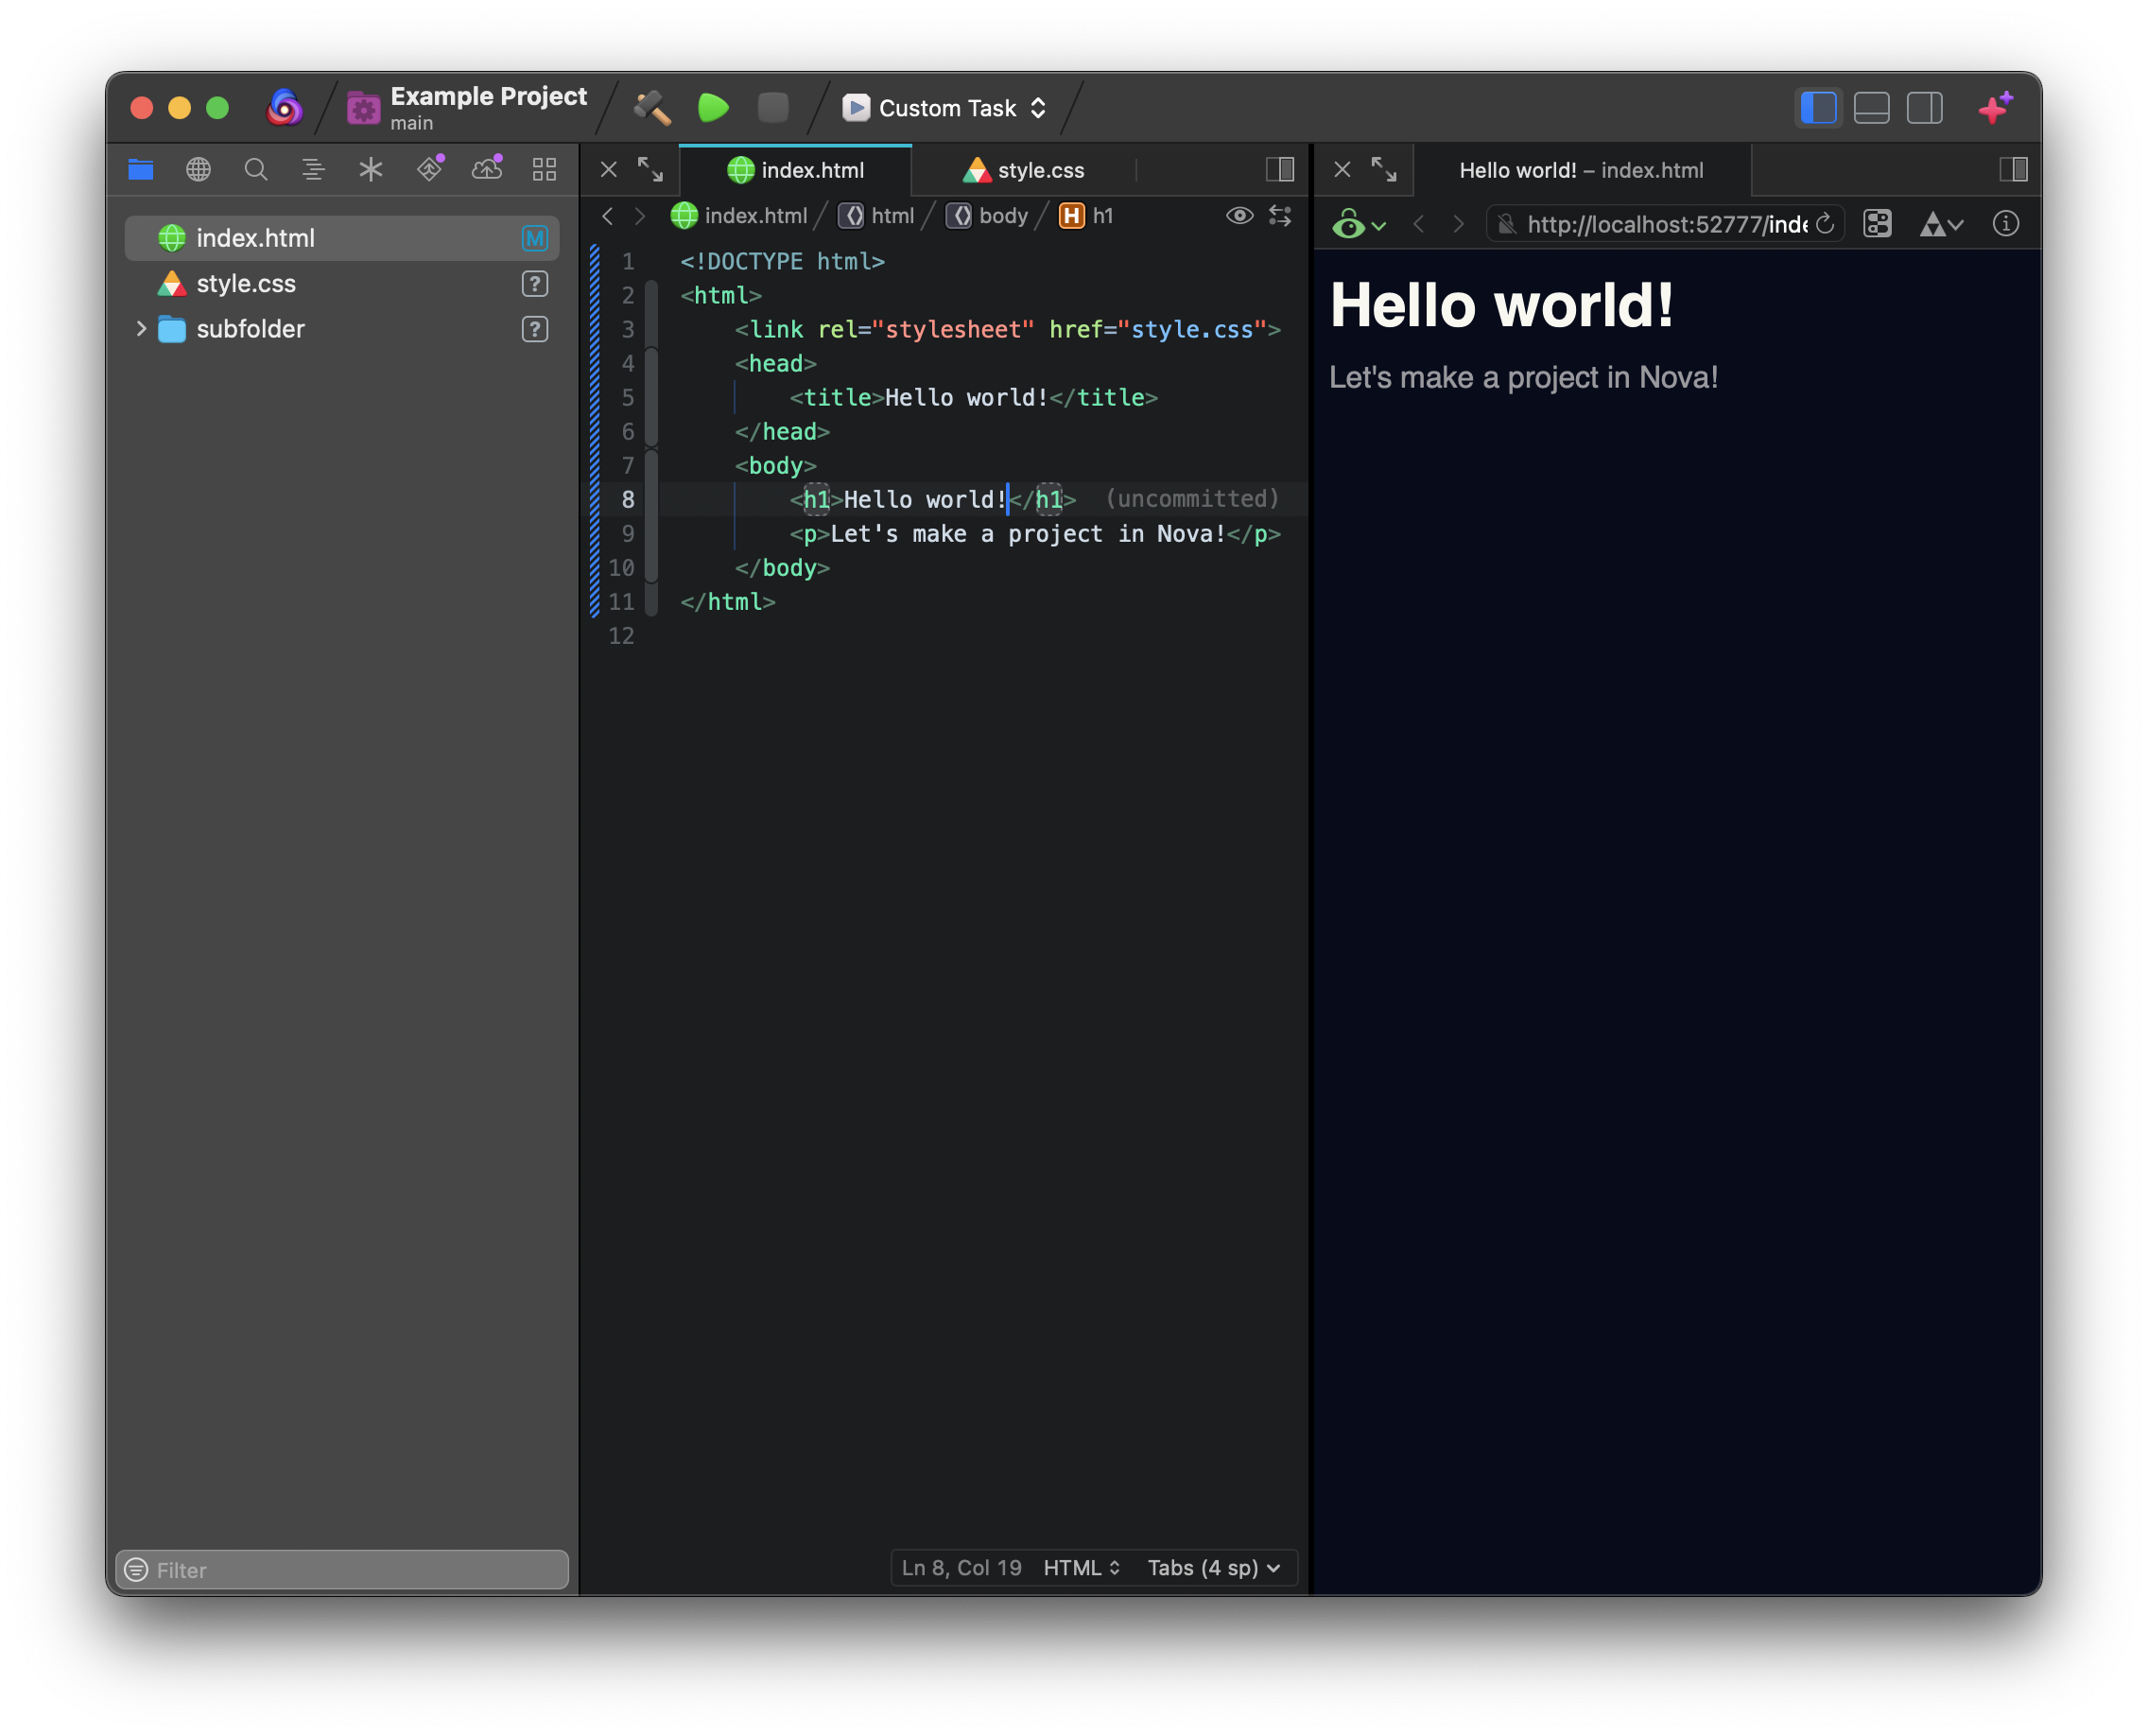
Preview tabs can automatically refresh as you save changes to the previewed document, or even live as you type. Nova includes a built-in HTTP server for previewing static HTML documents, but you can also point it to your own development server for more complex web applications.
Terminals
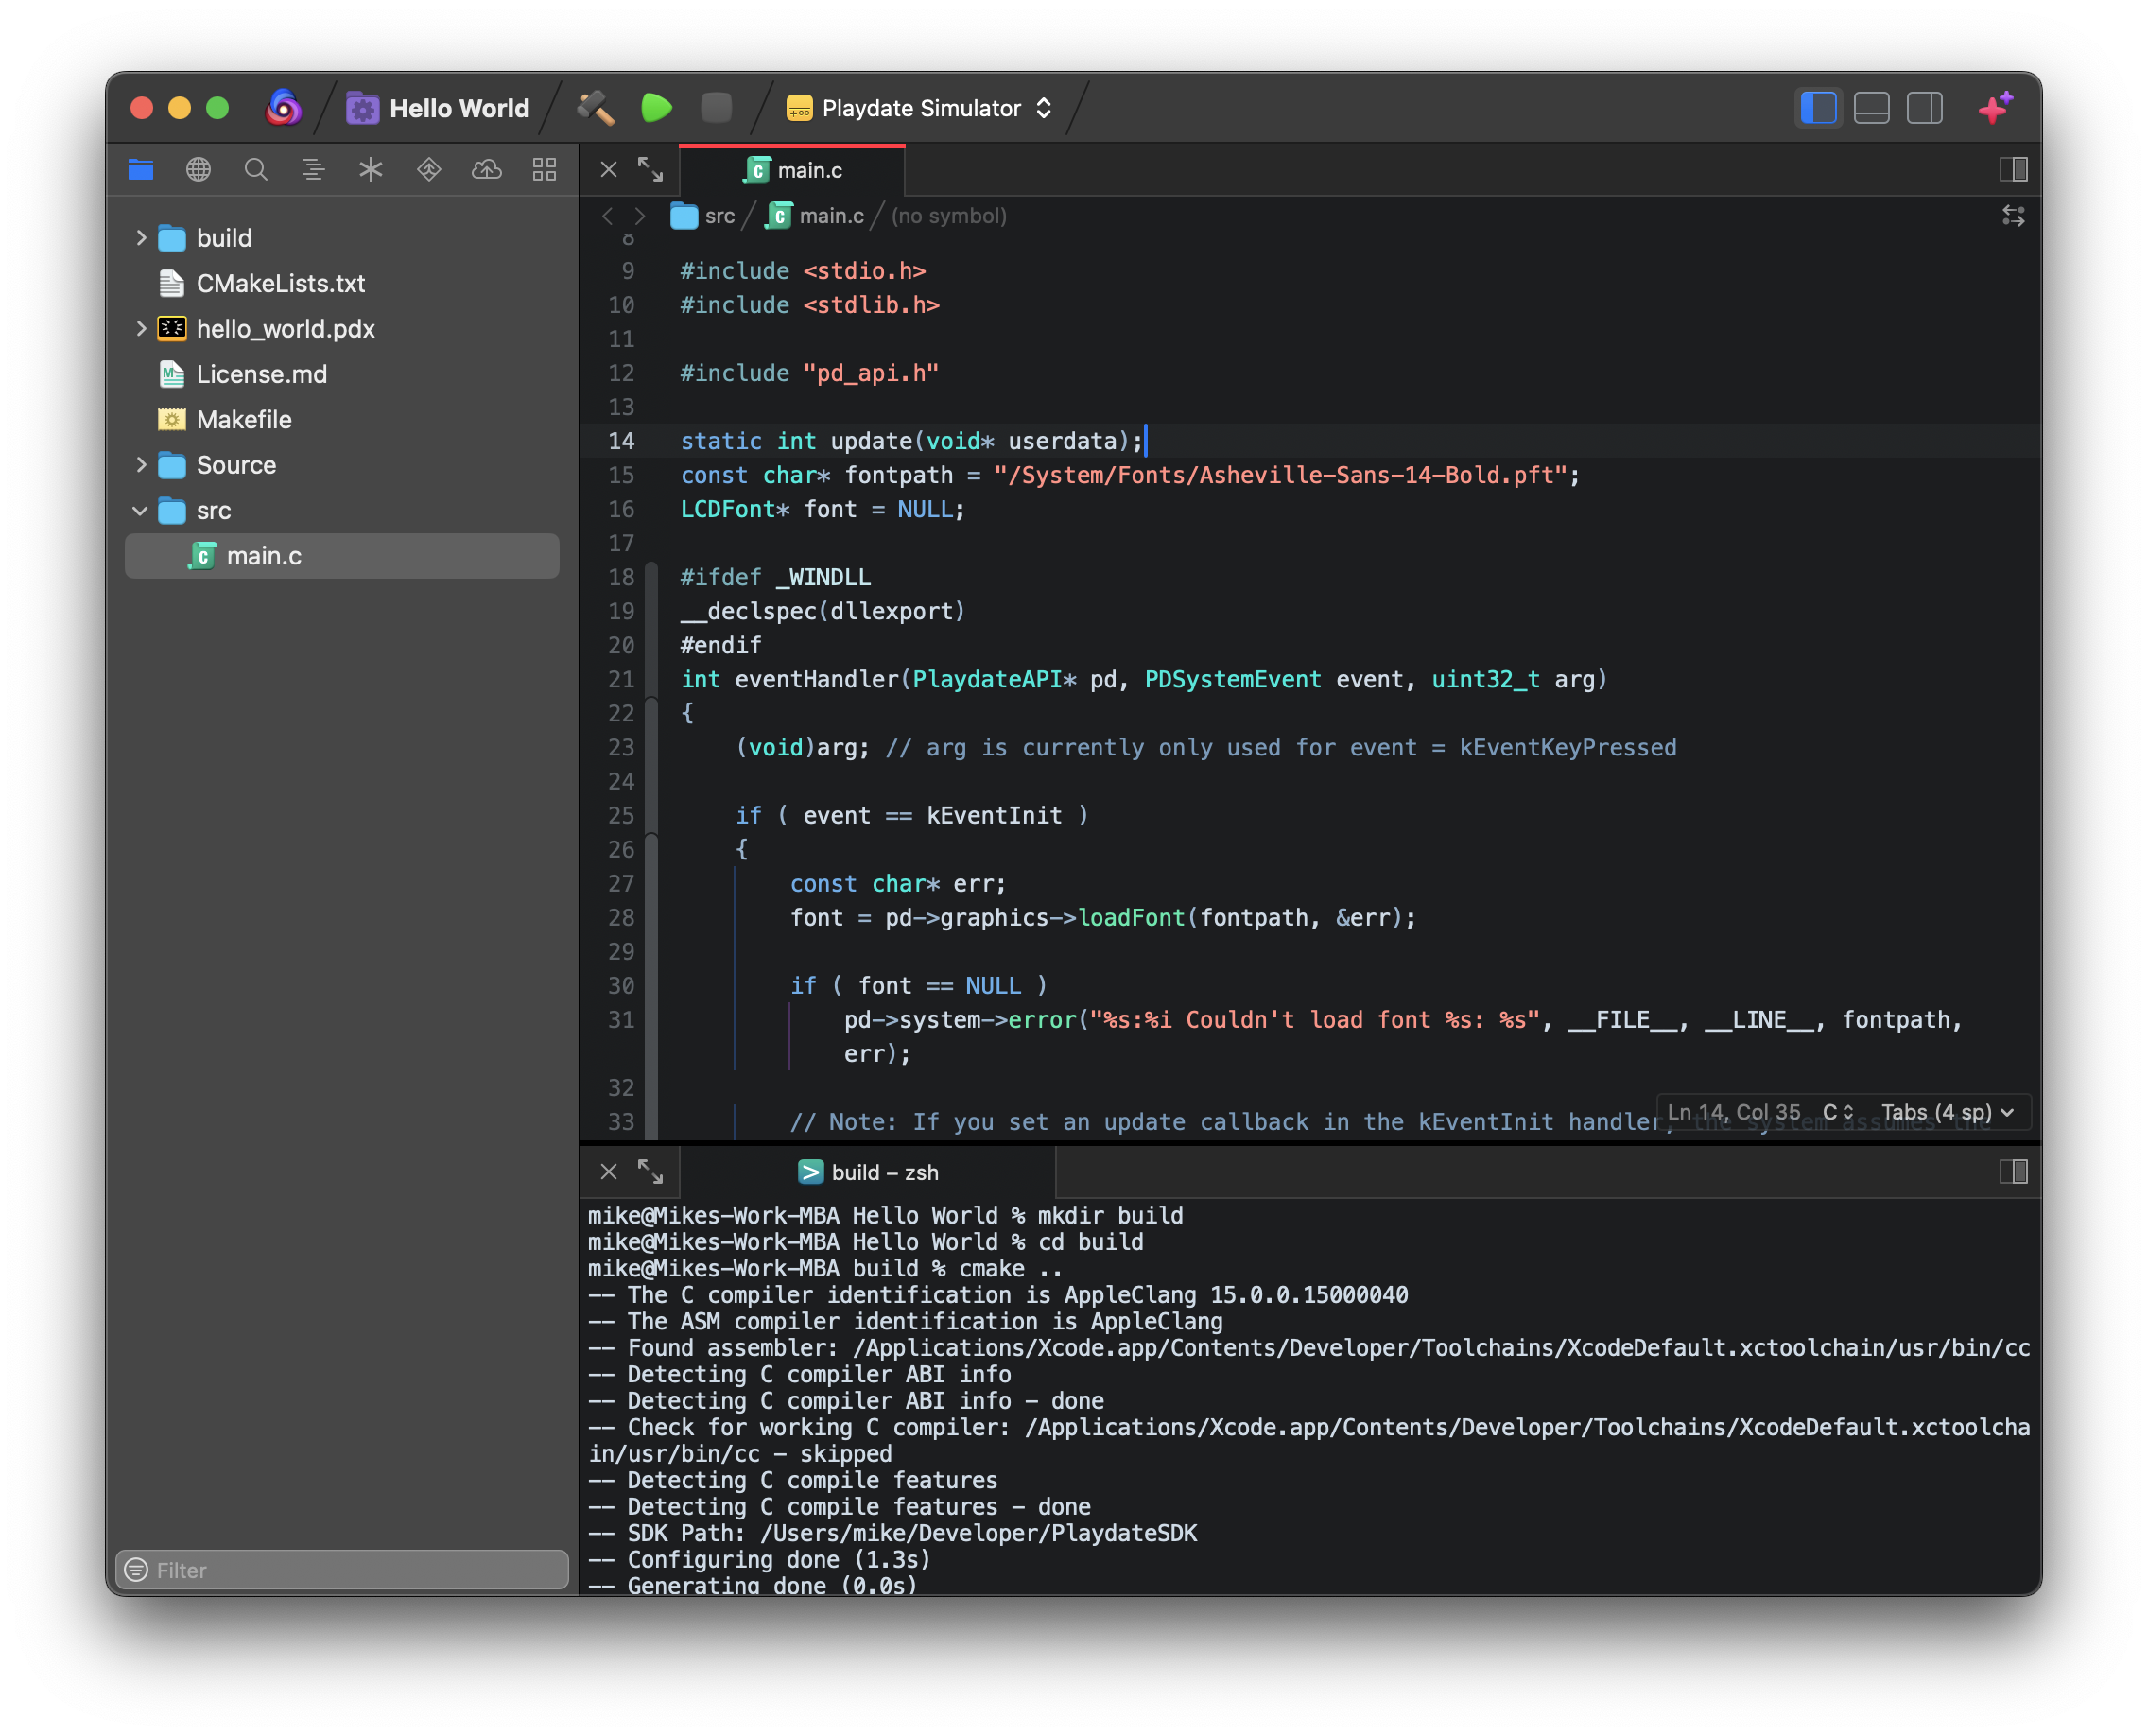
From the New Tab button, you can also open Terminal tabs. Nova supports both local terminals and remote terminals over SSH.
Using Git in Nova
|
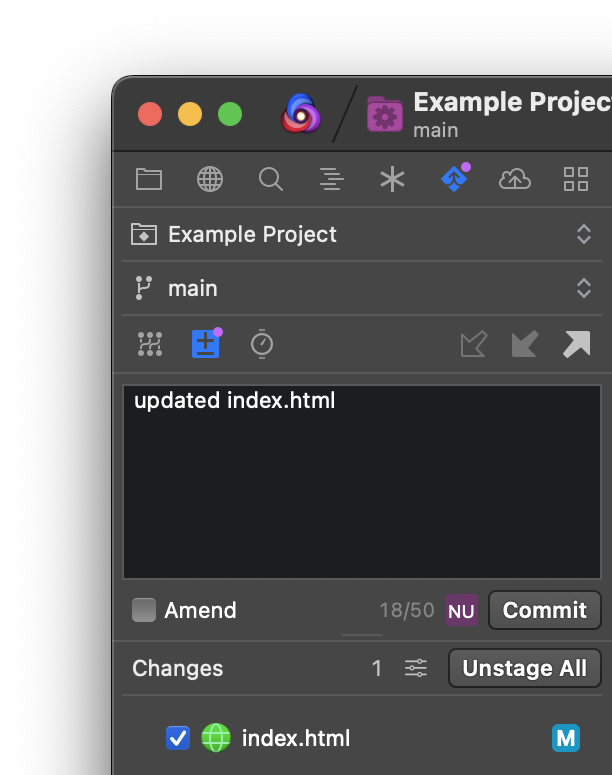
When working in a project with a Git repository in its root directory, you can use the As you make changes to files in your project, Nova will automatically track your changes and list them in the Git Sidebar for staging. Nova will also highlight changed lines in the editor, letting you see which lines have been changed, added, or removed since the most recent commit. |
|
Nova also integrates with a number of popular Git service providers, including GitHub, GitLab, BitBucket, and Gitea. You can sign into Git service accounts in Nova’s Settings, and easily use those credentials to access remote repositories.
Comparison View
Clicking a changed file in the Git Sidebar will open the file in Comparison View, which allows you to easily view changes between different revisions of a file. Comparison View shows the current state of the file in one pane, and the latest Git commit of the file in the other, with highlights to indicate changes since the most recent commit.
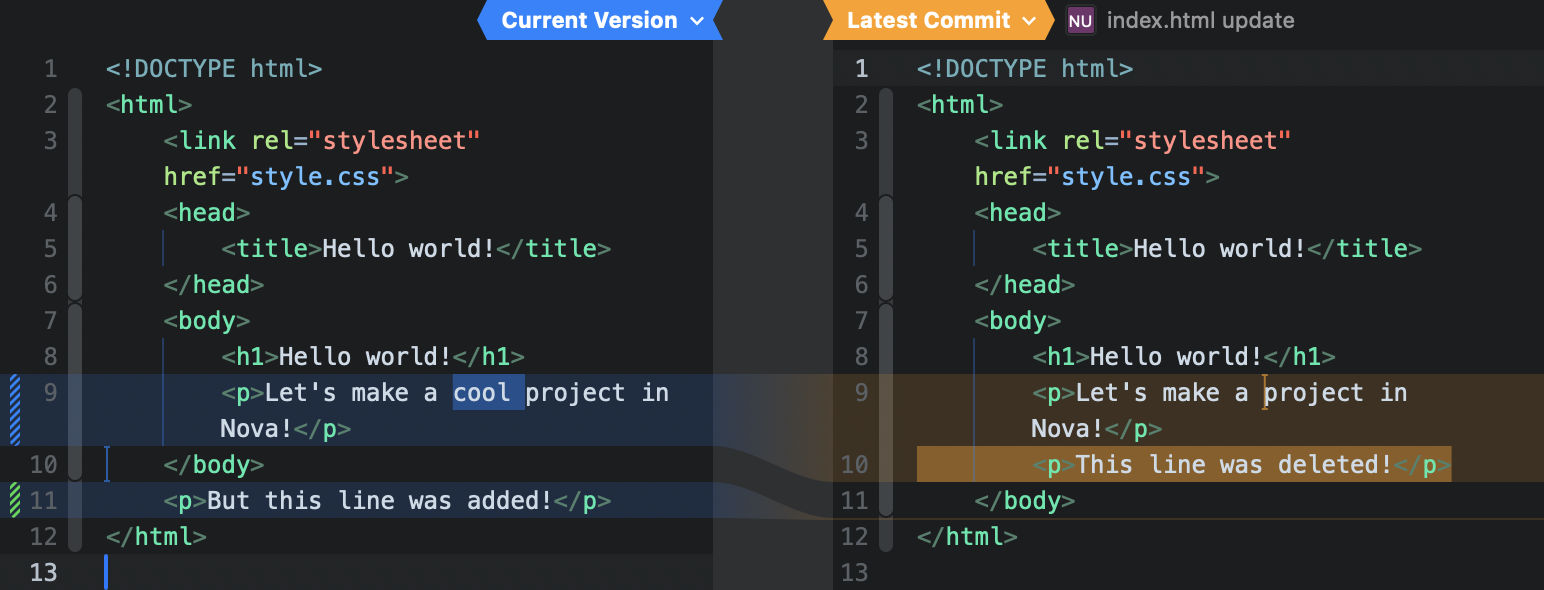
You can also manually open Comparison View for a particular file by clicking the icon in the editor’s path bar.
Project Settings
Click your ![]() Project Name in the toolbar to open Project Settings. (You can also find it in the Project menu > Project Settings.)
Project Name in the toolbar to open Project Settings. (You can also find it in the Project menu > Project Settings.)
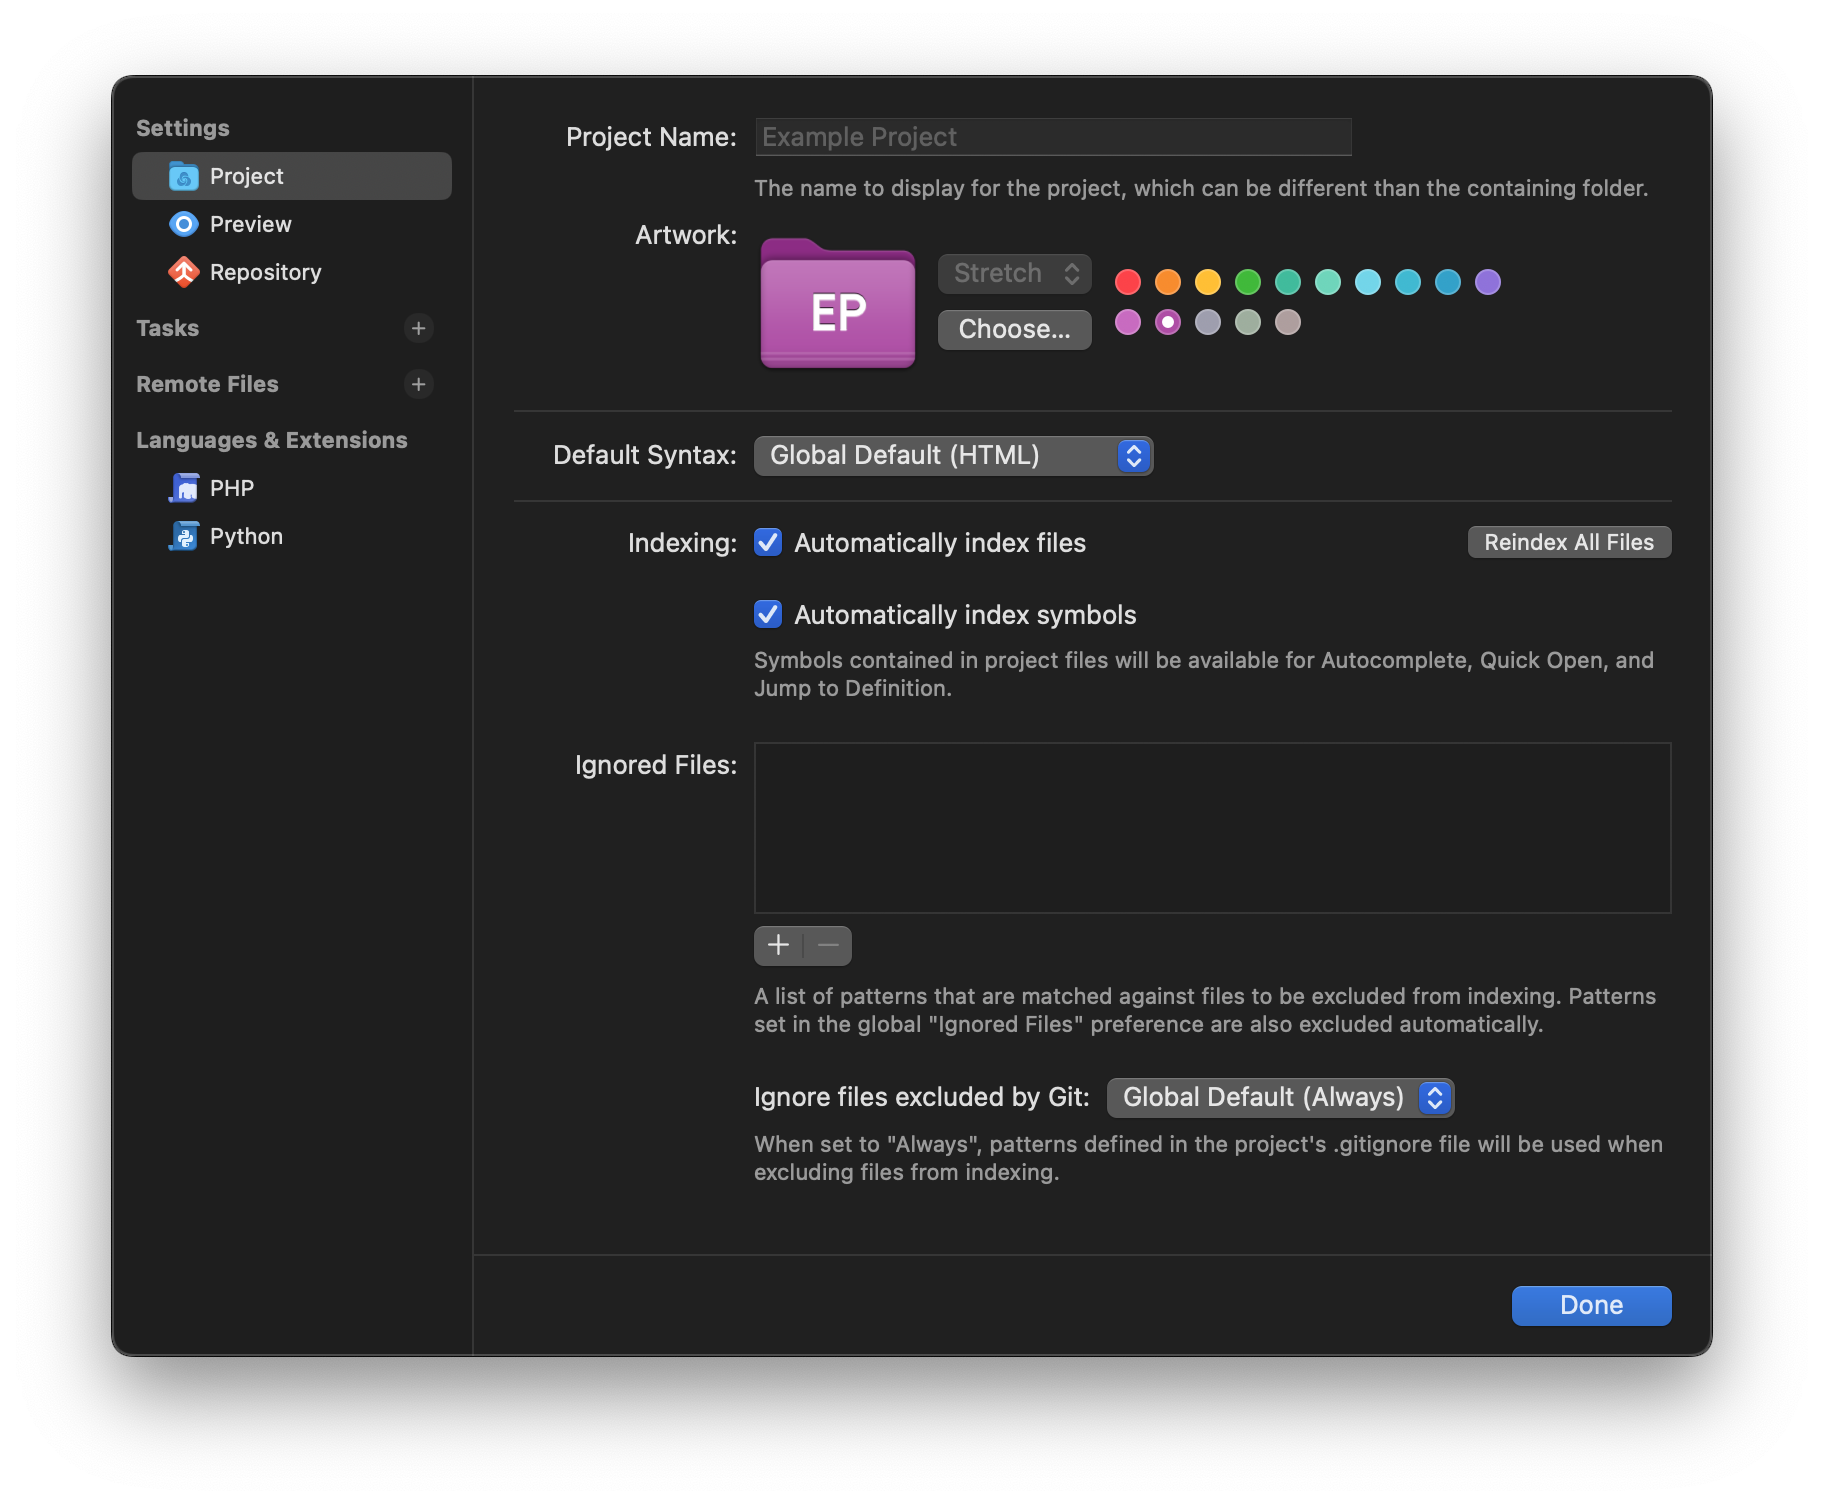
Here, you can configure project-specific settings, such as the default syntax mode for new files you create. You can also ignore files from the index used by Open Quickly, or force Nova to reindex your project files. Project-specific Extension settings can be configured here as well.
Connect to a Server
|
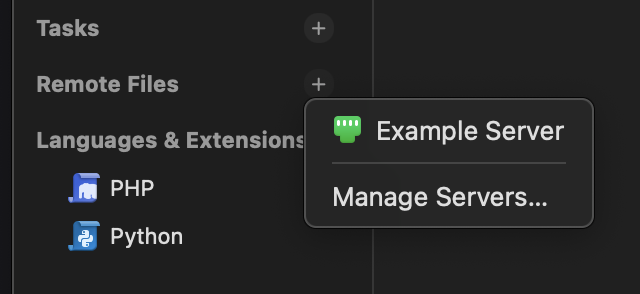
If you’re working on a project that will be hosted on the web, you can add a server to your project by clicking the + icon next to Remote Files. Nova supports a variety of protocols for connecting to servers, including FTP, SFTP, and Amazon S3-compatible servers. You can connect multiple servers to a project, such as linking both a ‘staging’ and ‘production’ server. |
|
Once a server has been added to a project, you can access it from the Remote Sidebar. If you add multiple servers, a dropdown menu at the top of the Remote Sidebar allows you to switch between them. You can also open File Browser tabs for an expanded view that allows for easy transfers between your server and local Mac.
Publishing
You can optionally enable Publishing to remote servers by selecting the server in Project Settings and checking the box next to Use Publishing.

Publishing is a Nova feature that allows you to track local changes to your project, then easily upload them all to your server. Publishing assumes you have a local copy of your website or web app that has basically the same directory structure as the copy on the server. As you makes changes to your local copy of a project, they will be queued for Publishing in the Publish Sidebar, where you can automatically upload them to their corresponding place on the server.
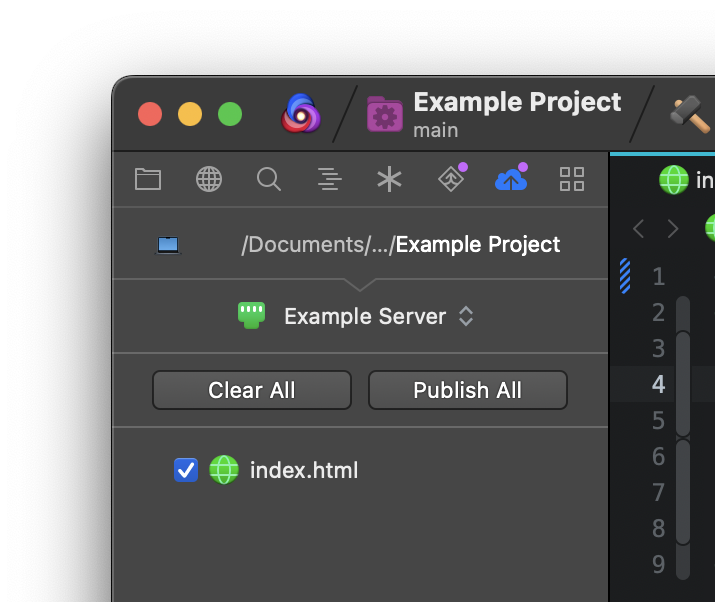
Learn more in our dedicated Publishing article.
Tasks
In Project Settings, you can also create Custom Tasks. Tasks are automated, scriptable actions primarily designed for building, running, and cleaning your project.
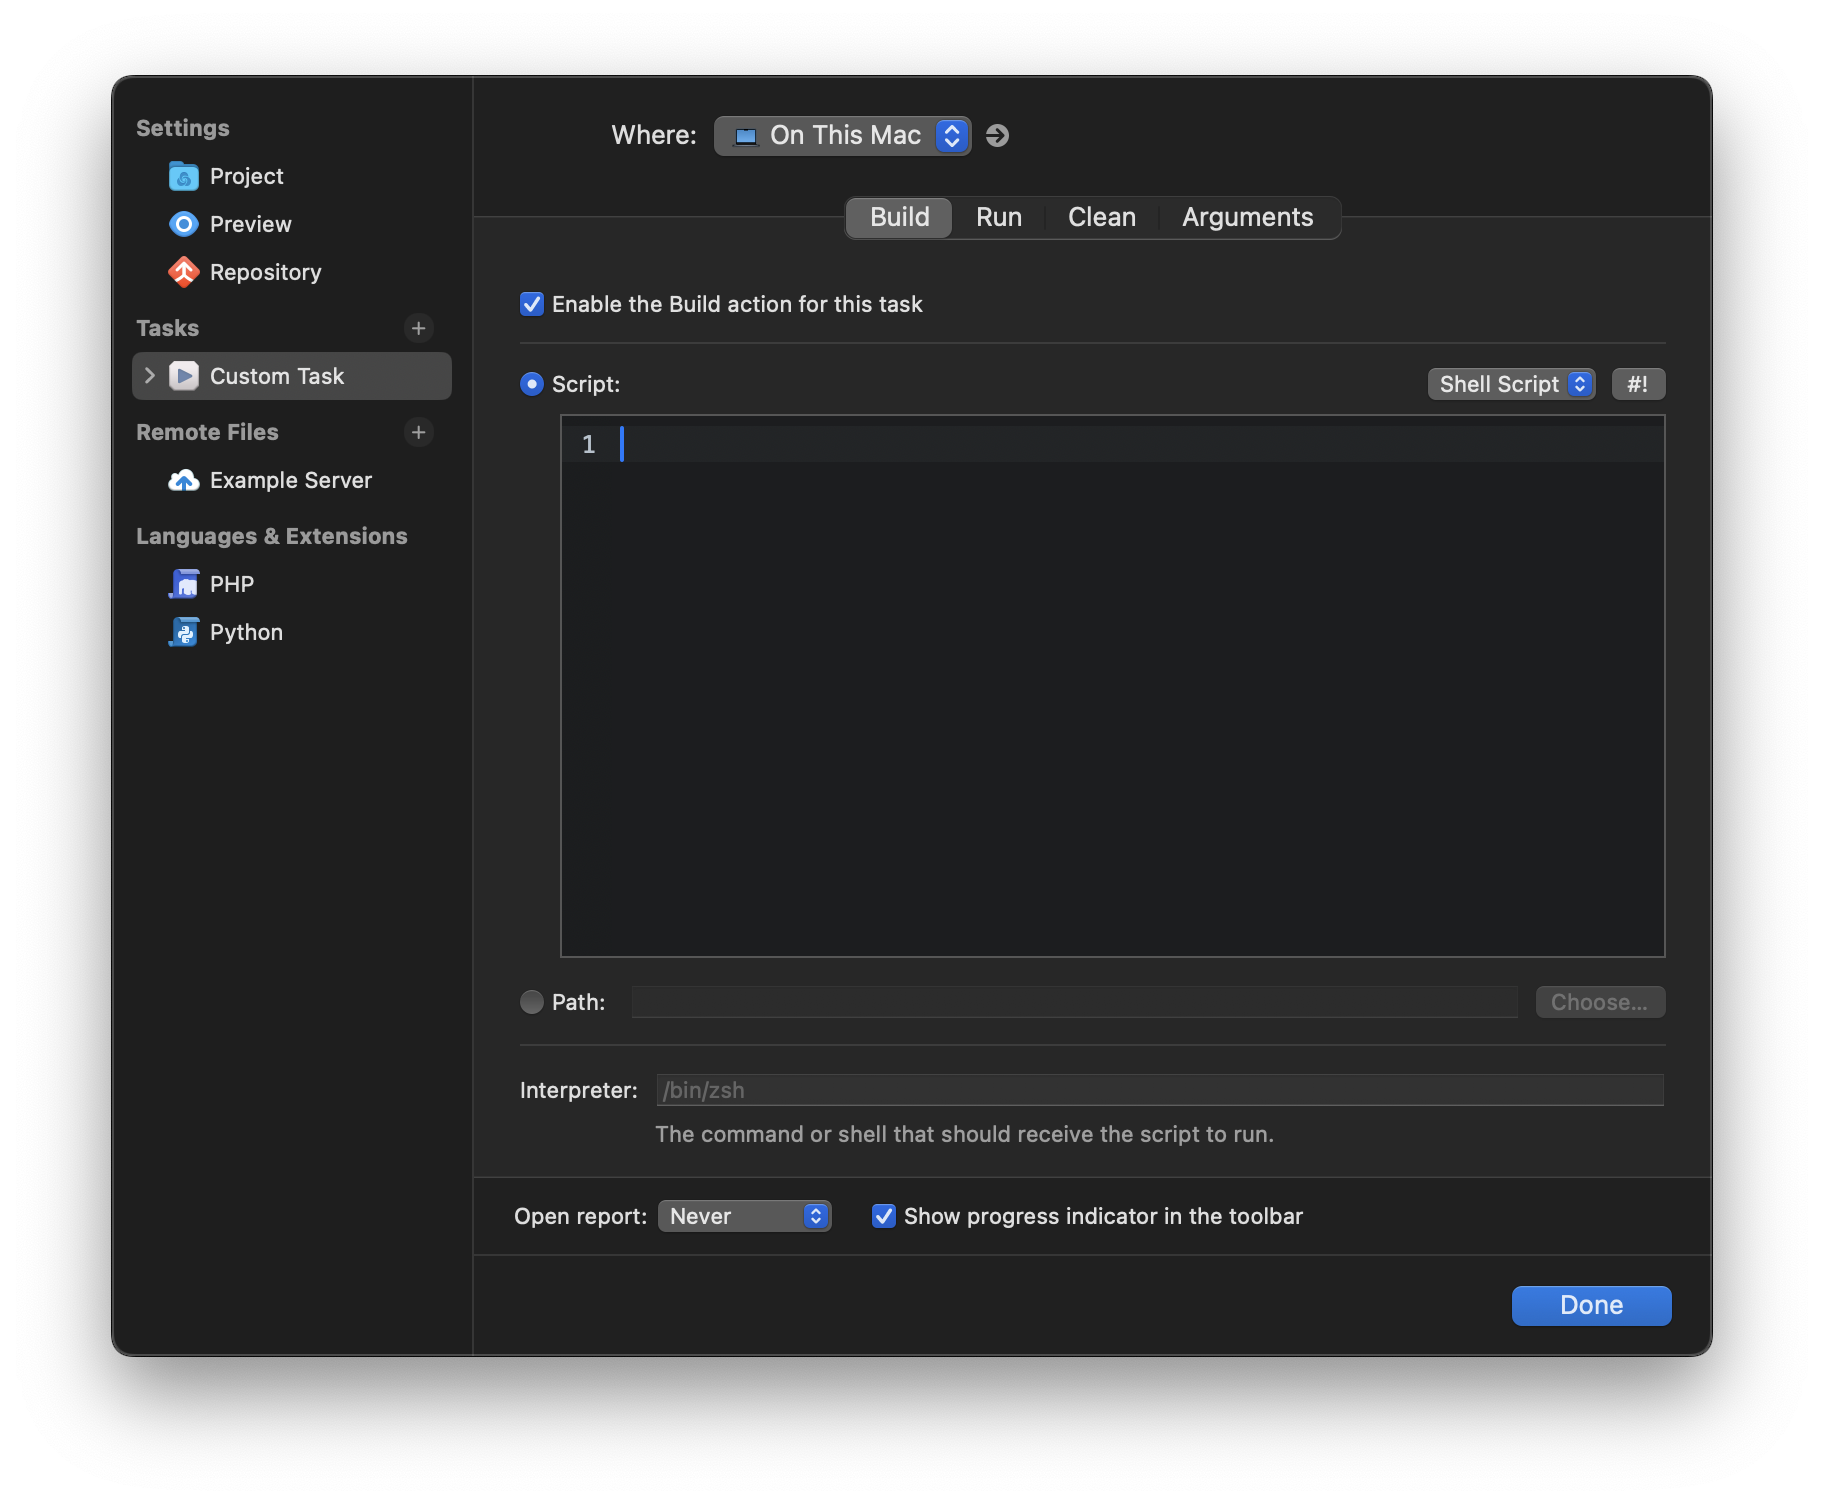
You can write scripts for Build, Run, and Clean actions here, and easily invoke them from toolbar icons in the main Nova workspace. Scripts can be written as standard shell scripts, or other interpreted languages such as Python or Ruby. Some Extensions may also provide Task Templates, which are essentially pre-written Tasks with configurable settings and arguments.
Debugging
You can also configure Debug Tasks, which allow you to run your project and connect to external tools to debug your code live as it executes. Nova includes debug tasks for a number of tools and languages, including Chrome, Deno, Node.js, PHP, and Python, with more available as third-party Extensions.
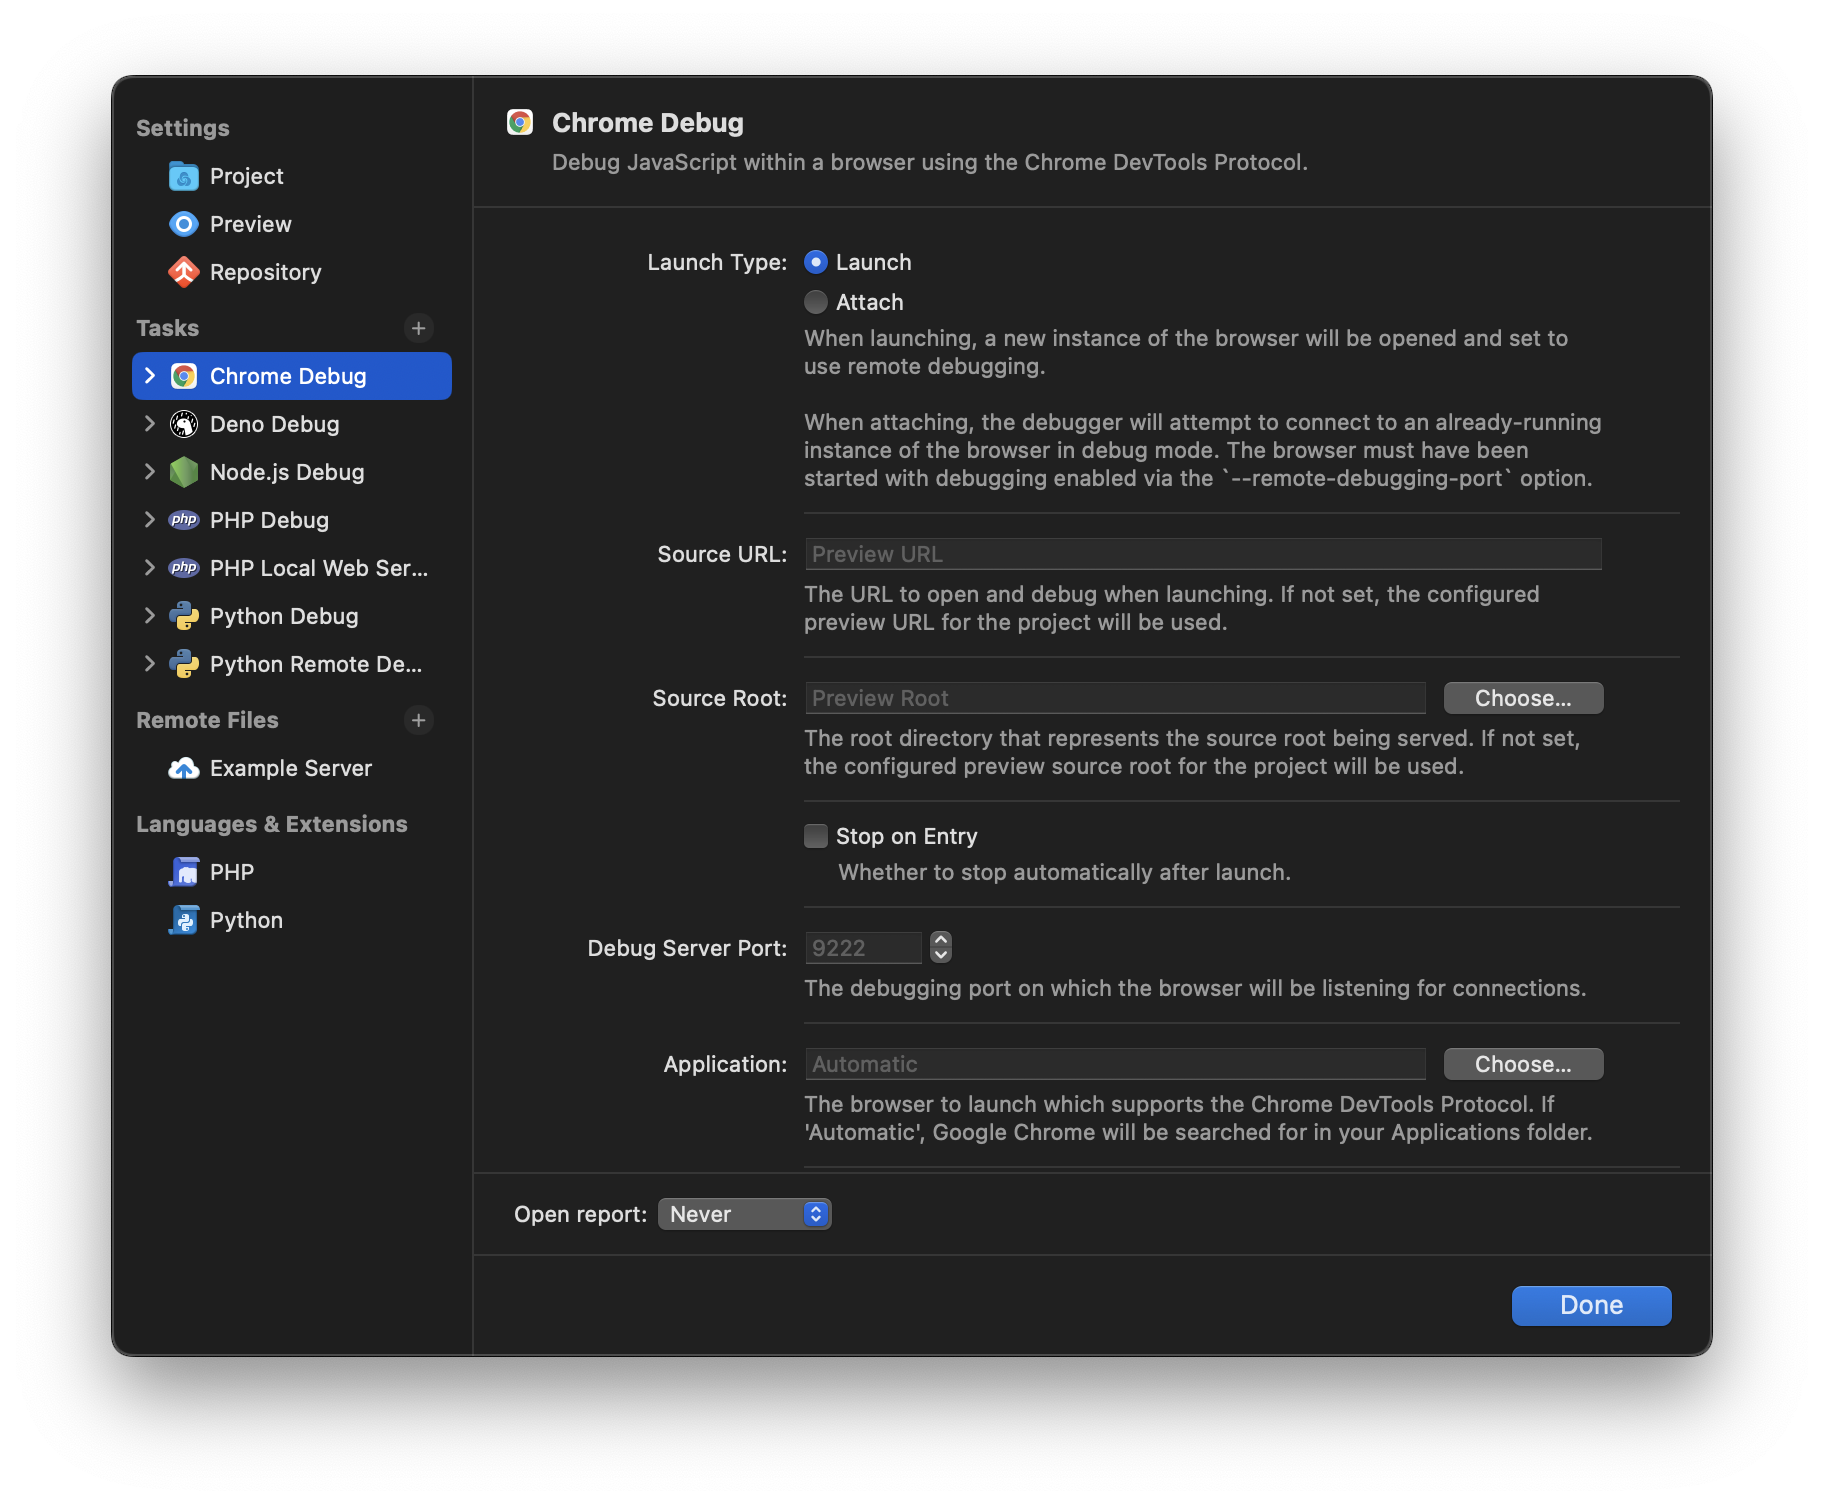
Once configured, you can start a Debug Task from the toolbar controls just like any other Task configuration. You can manually set breakpoints in the editor to have your code break on specific lines by simply clicking the line number in the editor’s gutter. Then, you can use the Debug Console to inspect variables, evaluate expressions, step through execution, and send debugger commands while your code runs.

|
← Previous First Launch |